SWTOR Nightmare Scum and Villainy operation guide
A guide to defeating the seven bosses in SWTOR Nightmare Scum and Villainy operation introduced with patch 2.2.2.
Note: This is a still work in progress. Currently 4/7 of the boss strats are available. 6/7 of the strats should be available later tonight.
Note 2: This guide assume you are familiar with hardmode mechanic, if not please use this to refresh.
Dash’roode
HP: 3.42 million (~1.4 mil more than HM) on 8m. Voracious Xuvva: 44.5k
Loot: Kell Dragon Belt, 1 random Shadowed piece
Differences from hardmode
- The shield you have to carry to move from one generator station to another is now much smaller. There isn’t a lot of room to fight inside the shield so you should plant it ASAP at the next generator station. You have 30s to plant the shield before it expires.
- Everything hit much harder, including the ticks from Sand Storm (~ 2.6k damage per tick).
HP: 3.86 million
Loot: Kell Dragon Implant, 1 random Shadowed piece
Differences from hardmode
- In phase 1, Titan 6 will throw out two Huge Grenades at players (seems to be based on top and second highest threat?) in the raid and any rocks that are under the Huge Grenade circle when it explodes will be destroyed. Our strat for dealing with this is to have everyone within 15m of the boss after Air Strike and this seem to put the Huge Grenades on the two tanks, making this mechanic fairly trivial. If a non-tank get it, they will need to be shielded and use their personal cooldowns as it hits fairly hard.
- You will need to standardize locations for the two players with the Huge Grenade to run to. The locations should be near a wall to minimize rock destruction but not so far out that they won’t make it back in time to hide for Launch. Remember that Titan 6 do port around during the fight so you will need to adjust as necessary. Generally, we have the raid stay in the middle while the two players with Huge Grenade run to the left and right back walls.
- Lastly, on phase 2, which begins at 20%, Titan 6 will throw one random Huge Grenade periodically at the raid in addition to all the other soft enrage mechanics. The targeted player need to bolt out of the raid and use personal defensive cooldowns to survive. Ideally you want to push Titan 6 fast so when he is near 20% so he doesn’t throw out two Huge Grenades before you enter phase 2.
HP: 2.73 million
Enrage: 5 minutes
Loot: Kell Dragon Earpiece, 1 random Shadowed piece
Thrasher is not an easy fight and you may get stuck on him for quite a while. In addition to the high damage output, there is quite a bit of RNG that can make this fight really frustrating.
Differences from hardmode
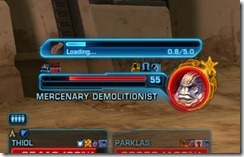
- Mercenary Demolitionist now stands in a different section of the wall from the snipers and will spam his Rocket Launcher ability every 5 seconds. He will have a a 5s channel where he will perform the Loading ability and then he will target a random person with the Rocket Launcher attack. This Rocket Launcher places a red reticle on the ground and you only have ~2s to move out of it. Bad reaction time or bad ping will get you killed as the ability hits for ~37k damage. What you can do is to have the person going after the Demolitionist call out whenever there is 1s left on Loading so everyone can start moving before the reticle lands to ensure safety.
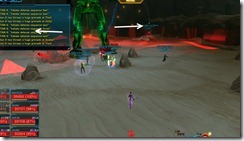
- Snipers hit like trucks, dealing on average 9-10k damage every hit. We have a tank, healer and 2-3 DPS stand next in front of Thrasher to get punted up the snipers. Tank will need to AoE taunt and grab all snipers aggros while ranged DPS from below eliminate them in a speedy manner. One of the DPS will be running to the Mercenary Demolitionist and call out reticles whenever there is ~1s left on his Loading. Healer duty is divided when snipers spawn, with one healer going up to heal the tank while the rest remain on the ground to heal the rest of the raid.
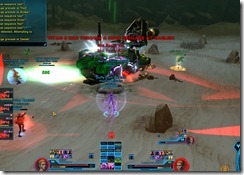
- Dealing with Firebugs is pretty much the same as hardmode. Remember to drop them near the stage/gates if possible as to not block access to the snipers when they spawn. You can move immediately when the Mercenary Firebug stops near you, there is no need to wait for him to actually drop it as you will take a big chunk of damage otherwise.
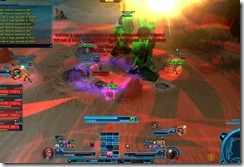
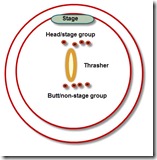
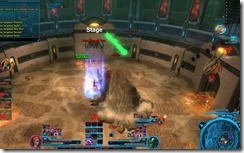
- When Thrasher get to below 50%, the next sniper group he spawn will contain two snipers, opposite of each other. What we do is as align Thrasher to face the stage where his handler Bo is standing and split the raid into two groups, each with a tank/healer and some DPS. One group will be standing near the stage and in front of Thrasher (a bit on the sides to avoid his frontal Swipe) and the other group will be standing away from the stage near Thrasher’s butt. The next knockback that Thrasher performs will knock everyone onto the outer rims where the snipers are. You now just need to run to the nearest Sniper group and kill them ASAP while avoiding the reticles from the demolitionist.
- You only get the double sniper once, rest of the fight continues as normal with a single sniper group that spawn instead. As long you don’t get killed by snipers or die to the reticles when your raid should be able to down Thrasher if you made it safely past the double sniper stage.
HP: Operations Chief 1.1 million, Rail Turrets: 23k
Loot: Kell Dragon Gloves, 1 random Shadowed piece
Differences from hardmode
- You have only 3 minutes to get to Operations Chief. This means not playing around with the security droids and start combat ASAP (we tend to start combat once people get to the second group). If done right, you will just make it to the Operations Chief in time with seconds to spare. You can engage Operations Chief when you have a tank, 2 healers and some DPS in the room without waiting for everyone to be in the room.
- Operation Chief’s AoE grenade hurt so make sure to spread out. This also applies to the Mass Explosive Probe he throws out which can be cleansed by mercs/operatives but not sorcerers. Terminate can mess up a tank bad if they don’t have their defensive cooldowns up and will pretty much one shot a DPS/healer.
HP: Assault/Artillery Droid (364k), Frontline/Recon Droid (243k), Olok the Shadow: 1.79 million, Shady Customer/Underworld Arms Trader (87k)
Loot: Kell Dragon Legs, 1 random Shadowed piece
Differences from hardmode
- In phase 1, the droids you purchase are hostile and have to be killed. This means that you want to save a low HP droid (i..e a frontliner or recon droid) as the last droid to purchase so that you can kill them quickly once the room fills with gas at the transition to phase 2. If you leave a melee droid (i.e. Frontliner) behind, you do not need to kill it before going downstairs for phase 2 as they cannot reach you.
- Phase 1 otherwise stays the same except for the high damage from the AoE flame circles and red circles. Failure to move out them in time can cause death.
- Phase 2 is largely the same from hardmode. You still get 1 minute per shield but the HP increase for the droids in Nightmare isn’t that big compared to hardmode (i.e. 364k in nightmare vs 312k in hardmode).
- In phase 3, both the Shady Customer/Underworld Arms trader cannot be CC’ed. Generally we kill the Arms Trader first and then work on the Shady Customer.
HP: Horic/Tu’Chuk/Sunder/Vilus Garr 1.07 mil.
Enrage: 6.5 minutes
Loot: Kell Dragon Mainhand, 2 random Shadowed piece
Differences from hardmode
- This fight is fairly challenging but luckily there is a strategy in place that make it fairly easy once you get two bosses down. Your kill order will be Horic –> Tu’Chuk and then kill Sunder and Vilus Garr at exactly the same time via using AoE abilities such as Orbital Strike.
- Phase 1 is extremely rough as all the bosses use their special abilities from hardmode (i.e. fixate for Sunder, grapple for Garr) in addition to new abilities (Horic get a corrosive grenade DoT, Tu’Chuk get an armor debuff).
- You will need to have a fixed areas for ranged DPS/healer/tank to stand so they don’t stand in each other’s conal area when Horic does his Spray and Pray ability. You can predict who will be targeted for conal as Horic will target that player before activating his ability. Call that player’s name out and have them start moving before Horic starts shooting to lessen the damage.
- Same thing applies to the tank kiting Sunder. They will need their own half of the room to kite Sunder so Sunder doesn’t fixate on the Tu’Chuk tank and deal excessive damage.
- Horic now applies Corrosive Grenade as an AoE attack to random raid members. This DoT tick hard and fast (around 4.2k per second) so will need to be cleansed ASAP. Fortunately, this DoT also have a slow component so anything that can remove movement impairment will also remove the DoT (i.e. Stun breakers will remove it).
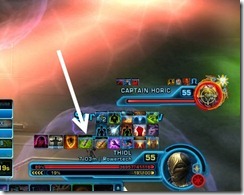
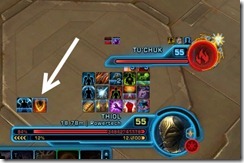
- In addition to the Corrosive Grenade that is going out, Tu’Chuk apply an armor debuff to his tank that removes all of their armor and is refreshed every 5 seconds. One of the healers will need to be on full time cleanse duty and cleanse that DoT off whenever it gets applied (pretty much everytime cleanse is off cooldown) in addition to normal healing duties.
- Once both Horic and Tu’Chuk are killed, Vilus Garr gains a stun ability (Surprise Shivving) where he will stun someone and stab them repeatedly for quite a lot of damage (around 8k per stab). This person will have a debuff on them that is easily recognizable. They will need to break out using a stun breaker or have healers ready to heal them.
- Stick your melee DPS on Vilus Garr and ranged DPS on Sunder. You will need to bring them both down extremely low (2-3k HP left) and then kill them together at exactly the same time with an AoE ability such as an orbital. If you screw up and kill one before the other, the remaining boss will immediately heal to full.
- If Sunder and Vilus Garr do happen to enrage, it is survivable as long you don’t let Sunder touch you with fixate and Garr stun you for too long (it is 15k per stab when enraged)
HP: Kell Dragon (1.6 million), Dread Master Styrak manifestation (316k), Dread Master Styrak (2.8 million)
Enrage: Longer than 17 minutes.
Loot: Kell Dragon Chest, 2 random Shadowed piece, chance for new mount called Titan 6 Containment Vehicle.
This fight is mostly about knockbacks so make sure your raid has plenty of knockbacks, stuns and slows. Mercenaries/Snipers and their Republic equivalent are good for this fight due to their 360 AoE knockback. Be sure to have high accuracy so you don’t get resisted. You can also purchase slow and stun grenades produced by Cybertech (useable for everyone) to aid in this.
Differences from hardmode
Phase 1
- Kell Dragon phase now have 3 separate adds that you need to deal with. One of them is an add that buffs Kell Dragon and need to be killed ASAP. The second add is the one that Force Choke the main tank. The third add is new in Nightmare mode and spawn right before the Spines phase. He will jump to one random player (usually in the back but not always) and do a knockback. Everyone need to spread out so the knockback affect the least number of players. This knockback add despawns right after so there is no need to kill him.
- Right before Spines hit, Kell Dragon will also punt the main tank quite a distance away and the offtank need to taunt it back immediately. Failure to do so cause the Kell Dragon to get buffed and deal more damage on the next Leap Slam.
- You will get 2-3 Spines phase (2 if you have really good DPS and can push it fast). Spines hurt and applies a nasty DoT to those getting hit by it. You want to position the raid in a line behind tanks to reduce raidwide damage. If done right, only the two tanks will get Spines (and maybe the player getting the knockback add).
Phase 2
- Spread out once Kell Dragon is killed as Dread Master Styrak will spawn and do a Thundering Blast (conal attack) immediately. Spreading out reduces the chance you will get hit by it if the tanks didn’t grab and turn him immediately.
- After Thundering Blast, he will perform Force Storm (it is called Force Lightning but has the Force Storm symbol) before summoning his Chained Manifestations. There is a small explosion at end of the Force Storm so be sure to spread out to avoid overlapping damage.
- One of the players will also get sucked into the Nightmare Manifestation and leave behind a purple circle on the ground. This purple circle will damage you if you stand in it but it ticks very slow and for very little damage you don’t really need to worry about it. We tend to stack in the middle to drop the purple circle there before heading out to control the Chained Manifestations but this may not be necessary.
- For Chained Manifestations, you cannot ignore the four approaching manifestations and just focus on the big manifestation in the middle. The big manifestation in the middle have 316k HP and there is no way you can kill him before the smaller manifestations close in and wipe the raid. Luckily, they are vulnerable to knockbacks, stun, slow, Force Push, Force Choke, and slow/stun grenades crafted by Cybertech. You will want to split the raid into groups of 2, each dealing with an approaching manifestation. Stun/slow them as they approach and mercenaries/snipers can use their AOE knockback as a last resort if they get too close. Be sure to interrupt the Suffering channeled by the big manifestation in the middle as it can cause your knockbacks/stun etc to get resisted on the smaller manifestations.
- After the Chained Manifestations, four Lightning Manifestations will spawn and DPS/tanks will need to run to them immediately. The difference from hardmode here is that they no longer spawn in fixed locations. Instead, their spawn is a bit random and sometimes two manifestations can spawn in the same place. Assign your players to cover a general area rather than a specific spot. We have each of the tanks on a Manifestation and the remaining four DPS split into two Manifestations to kill them quicker before aiding the tanks. These guys hit quite hard so the faster you kill them the better.
- Rest of phase 2 is simply a repeat of Force Storm –> Chained Manifestation –> Lightning Manifestation. You will need to do the Chained Manifestation part 5-7 times without any screw ups. A resist here or there can ruin the day, making the fight a bit RNG dependent.
Phase 3
- Reanimated Kell Dragon hits quite hard with his repeated Leap Slam so lots of AoE heals are needed. He applies a debuff to tanks so make sure to tank swap at ~ 4k stacks.
- Once reanimated Kell Dragon is dead, we have everyone run back to the entrance and put their backs on the wall below the ledge you jump down to prevent getting Force Pushed and receive a deadly Saber Throw. Styrak have a frontal knockback/stun so be sure to turn him away from the raid as well.




Pingback: Assassin Anthology | Scum & Villainy Nightmare Guide()