SWTOR 5.1 Uprisings Guide

A guide to the five new Uprisings added with Patch 5.1.

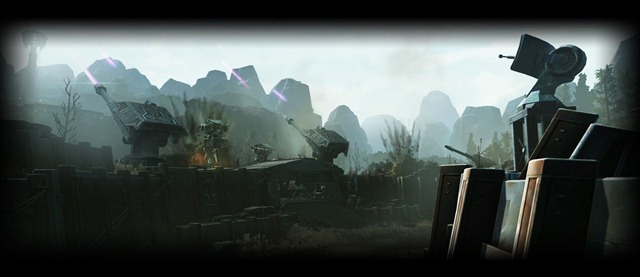
Trench Runner

Republic Loyalists under the command of General Amos Rike have displaced Alliance forces on Denova and seized control of the baradium mines. Efforts to reclaim the mines have been thwarted by Republic artillery bombarding the “no man’s land” between the Alliance beach head and the central processing facility. But where an army fails, a small team could succeed in navigating the battlefield trenches and taking out the Republic defenses.

4E2A674B0000C21B

Trash and Commanders

This is the same trench before the puzzle boss in Explosive Conflict operation and just as every bit cancerous. You need to activate three bunkers on your way to the final boss and you activate them by killing the named Commanders that spawn at each bunker. They are not really special except for the fact that they will continuously spawn large groups of ranged mobs that can seriously wreck your group. Generally the best tactic to use is to burn down the Commanders first since they have low HP and then focus on rest of the adds. You can have one person draw aggro on the adds and kite them around using line of sight or have everyone just line of sight the adds and AoE them down.

swtor-trench-runner-uprising-guide

General Rike’s Hover Tank

  • Tank HP: 1.44 mil (story), 2.98 mil (veteran)
  • General Rike HP: 204k (story), 408k (veteran)

Mechanics

  • The Tank has two main attacks, a Missile Blast attack that drops circular AoEs on the ground and a Charged Warhead attack on the target with highest threat that deals fairly high damage.
  • Every 25%, The Tank will knock everyone off, gain shields and start to regen health. Destroy its shield by activating the airstrike button that is provided.
  • Whenever General Rike says – “Now you’ll see what real Republic soldiers can do”, he will summon a bunch of Republic soldiers and droids that need to be killed.
  • Once the tank is destroyed, General Rike will jump down and you have exactly 30 seconds to klll him.

swtor-trench-runner-uprising-guide-3swtor-trench-runner-uprising-guide-2

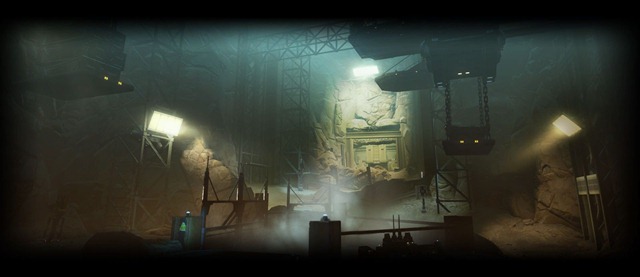
Destroyer of Worlds

Jedi Master Adelade is trying to awaken a dangerous abomination that has hibernated beneath the surface of Makeb for millennia. No records exist of this monstrosity, known only as Gethul. But if the creature awakes, it may be strong enough to destabilize Makeb’s core and obliterate the planet. Infiltrate the underground tunnel, secure the explosives and deliver the payload to Gethul’s lair. Only then can you destroy the monstrosity and save Makeb from Adelade’s deranged plan.

E1C7358C29EFE868

Dark Whispers Debuff

Upon entering this uprising you will notice a debuff on your bar called Dark Whispers, this will reduce healing received on all members of your party until you remove it.

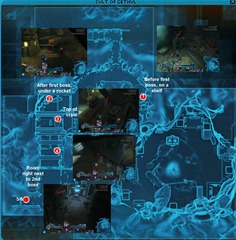
To remove this debuff, you will need to collect six Dark relics that are scattered from the entrance to the second set of bosses. Once you collect the relics, you can summon a bonus boss at the same location as the second boss that allow you to remove this debuff. There is also an achievement for defeating this bonus. Getting this debuff removed will be handy for Veteran Mode and Master mode in the future.

Do not summon the bonus boss until you defeat the second boss or you will need to do two fights at once.

swtor-whispers-in-the-dark-bonus-missionswtor-destroyer-of-worlds-uprising-guide

Droid Escort

When you enter this instance you will find small boxes lying around. These contain Droid repair kits. The droid you escort has a tendency to run ahead and get damaged by the mobs and tenacles that pops out of the ground. If this happens, it will shut down and you will need to use the repair kits to get it moving again.

swtor-destroyer-of-worlds-uprising-guide-2swtor-destroyer-of-worlds-uprising-guide-3

There is an achievement for finishing the instance without needing to repair the droid. This is best done on storymode and you need people to run ahead of the droid to clear the mobs and kill the tentacles as soon as they spawn to ensure the droid doesn’t shut down (tentacles only spawn if the droid is nearby).

swtor-destroyer-of-worlds-uprising-guide-4

Chief Engineer Penzaren

  • HP: 499k (story), 924k (veteran)

Mechanics

  • Immune to damage at the beginning but summon waves and waves of Keeper Droids and some elite Eradicator Droids. Line of sight these droids so they all group up and you can AoE them down. Otherwise your group may get wiped out by the damage from these Keep Droids, especially on Veteran mode.
  • Casts something called Area Purification that leaves behind a red circle on the ground, does moderate DoT damage if you stand on it.
  • Keep killing waves of Keeper Droids until Penzaren’s shield are removed and then focus damage on Penzaren. Keeper Droids will continue to spawn but in smaller numbers.

swtor-destroyer-of-worlds-uprising-guide-5swtor-destroyer-of-worlds-uprising-guide-7

Velloc & Skurr

  • HP: 469-477k (story), 1.17-1.23 mil (veteran)

Mechanics

  • Both bosses need to be killed within 9 seconds of each other as one of them casts Primal Rejuvenation after one is killed and this will resurrect the dead one at half HP after the cast is completed. Therefore spread your damage evenly and coordinate the kills.
  • Velloc has a frontal conal Maul attack and a large circular Smash knockback attack that isn’t friendly to melees. Tank can keep him in a corner and let the ranged DPS wail on him.

swtor-destroyer-of-worlds-uprising-guide-8swtor-destroyer-of-worlds-uprising-guide-9

The Caller In the Dark

  • HP: 1.43 mil (story)

This is the bonus boss you summon for the Dark Whispers bonus quest. You should only summon it after you have killed Velloc and Skurr. There is an achievement and decoration for killing this bonus boss.

swtor-destroyer-of-worlds-uprising-guide-12

Mechanics

  • This is a fairly overtuned boss that deals heavy damage. His main attack is Obliterate, a roomwide AoE knockback that deals significant amount of damage and casted very often. If his main threat target is not within melee range, he will continually spit at his target, which hurts more than his melee autoattack.
  • Summons 4x Void Whispers adds frequently that need to be killed ASAP as they deal quite amount of damage.
  • When it reaches low HP, it cast a channeled ability called Extract on a group member. This cannot be interrupted and allows the boss to regen a small amount of HP. You need to kill him quickly or he has a tendency to spam this ability over and over.

swtor-destroyer-of-worlds-uprising-guide-13

Jedi Master Adelade

  • HP: 1.43 mil (story), 2.1 mil (veteran)

Mechanics

  • Adelade has two basic attacks – Leap and Force Wave. Adelade doesn’t move while she is doing the Force Wave attack (yellow frontal cone) so this huge knockback can be easily avoided. She tend to Leap to targets if they have aggro and is far away. Her leap location is marked by a blue circle.
  • Adelade also has a constant debuff that deals tiny DoT damage and slows down your movement speed. This debuff interacts with her Ancient Madness attack, which is a huge purple circle around her that spawns periodically. You have 3 seconds to move out of it or receive massive damage (50-60k damage on veteran mode). This mechanic is the biggest killer on veteran mode if people can’t move out fast enough due to the movement debuff.

swtor-destroyer-of-worlds-uprising-guide-11swtor-destroyer-of-worlds-uprising-guide-10

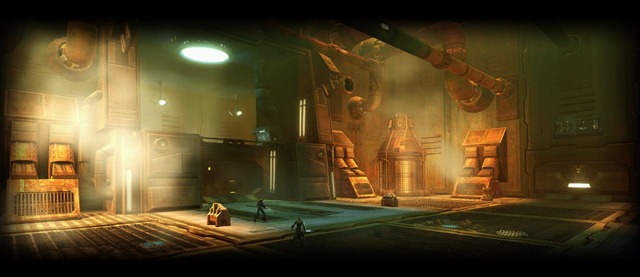
Divided We Fall

Rogue Coruscant security agents are plotting a false flag operation. They intend to attack the Senate Tower and plant false evidence in the hopes of inciting the Republic to war against the Alliance. Intel has traced the mastermind behind the plan, Commander Kalin, a former Republic veteran to a hidden base inside the The Works on Coruscant’s lower level.

6A925CAE024904CE

Beta Cthon

  • HP: 510k (story), 941k (veteran)

This is a small boss you will encounter after getting past rooms of Cthons. He doesn’t have many mechanics excepting some knockbacks but he will summon Cthons and eventually Savage Cthon adds that hurt quite a bit. If you fight him at the gate (instead of where he spawns, you can avoid fighting some of the adds that spawns).

swtor-divided-we-fall-uprising-guide

Escape the Room

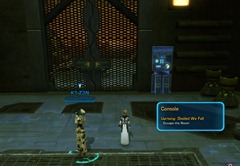
There is a locked gate you will encounter after fighting through some rogue droids. Everyone has to interact with the gate.

swtor-divided-we-fall-uprising-guide-2

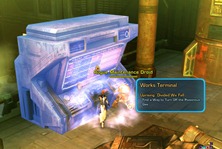
Once this happens, poison will start to spawn in the room. You need to interact with the grapple points on either wall and then interact with the two consoles to stop the poison. As you are dealing with the consoles, droids will also spawn in the room to make your job difficult. On veteran mode you need to this quickly as the damage from the poison and droids can kill group members quickly.

swtor-divided-we-fall-uprising-guide-3swtor-divided-we-fall-uprising-guide-4

Hold Your Position

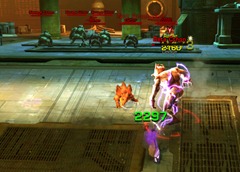
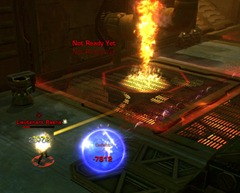
After escaping the room with poison gas, you will need to defeat waves of droids that cumulates with Lientenant Raena. The main thing to watch out for are the floor grates which can lit up on fire and damage you if you stand on it.

swtor-divided-we-fall-uprising-guide-5

Commander Kallin and Alpha Cthon

  • Commander Kallin: 1.01 mil (story) 1.87 mil (veteran)
  • Alpha Cthon: 1.01 mil (story) 1.87 mil (veteran)

This is an annoying pair of bosses due to the insane damage output from Commander Kallin.

Mechanics (Alpha Cthon)

  • Kallin will summon Alpha Cthon and teleport up top. From there he will spam Mortar Volley that are marked on the ground with a big red circle. The issue with this attack is that you have very little time to get out and it hit like a truck. It can basically kill someone in two hits on Veteran mode if they don’t get out fast enough.
  • Alpha Cthon has usual Smash attack you need to interrupt as much as possible as this attacks knocks its target down on the ground, making them likely to be killed by Mortar Valleys from Kallin.
  • Kallin will also throw down Cryo Grenades at random players, so save your stunbreaker for when you get a Cryo Grenade and Mortar Valley at the same time.
  • When Alpha Cthon summon Cthon adds, they need to be wiped out immediately as the Cthon have attacks that basically stun you (stun breakers and Force barriers won’t work) and get you killed by the Mortar Valleys.
  • Additionally, the floor will lit up on fire periodically,. so you don’t want to fight on top of the metal grates.

swtor-divided-we-fall-uprising-guide-7

Mechanics (Kallin)

  • Kallin will jump down once Alpha Cthon is killed. He still has his deadly Mortar Volley and Cryo Grenades but will also add two more attacks to his arsenal.
  • Explosive Surge is an AoE around Kallin that really only concern melees as they need to move out.
  • Kallin will also pick a target and perform Spray and Pray, a channeled conal attack that follows a specific person called out in red text. Everyone need to avoid standing next to that person as to not eat collateral damage.

swtor-divided-we-fall-uprising-guide-8swtor-divided-we-fall-uprising-guide-9

Landing Party

Deserters from the Zakuulan military were tracked to Rakata Prime. Under the leadership of the former Battalion Commander Tassar, they are building a new and improved Star Fortress. Infiltrate their surface camp and eliminate Commander Tassar before her operations threaten galactic security.

8C473FB600B63196

Scout Captain Sterla

  • HP: 1.22 mil (story), 2.55 mil (veteran)

Mechanics

  • Sterla has a Vengeful Slam attack that melee players need to avoid.
  • He will periodically summon laser beams that spawn and move all over the map. These laser circles get more numerous as the fight goes on but disappears when he summons the big group of adds. They deal massive damage if they pass through you (50% of your HP or more).
  • Summons small groups of adds periodically but also summon a large group of Skytroopers (~15). Some of these skyroopers will knock you down or Sonic Missile you so you can’t use stunbreak/defensive CDs to get out of the knockdown. If you get knocked down inside a laser circle it is pretty much game over.

swtor-landing-party-uprising-guide-2swtor-landing-party-uprising-guide

Primal Gargantuan

  • HP: 1.22 mil (story), 2.66 mil (veteran)

Mechanics

  • Mostly a tank and spank boss except for one mechanic. When the Gargantuan does its Howl attack, you need to get inside the orange circle or you will take periodic damage.

swtor-landing-party-uprising-guide-3

Commander Tassar

  • HP: 1.50 mil (story), 2.58 mil (veteran)

Mechanics

  • Force Slam channeled attack on a player with highest threat. They need to use stunbreaker to break out of it.
  • Summons Ravenous Void, purple glowing circles on the ground that deals large amount of damage and can kill you in a few seconds if you step in it. Mostly an issue for melee.
  • Picks a random player to be an Unstable Conduit, this player will also have a purple circle that follows them around. They need to get away from rest of the group members to avoid damaging the group.

swtor-landing-party-uprising-guide-5swtor-landing-party-uprising-guide-6

Observe and Report Achievement

For the achievement Observe and Report, you can find the Imperial Sky hiding in the bushes near the final boss. Special thanks to Civilian of Begeren Colony for locating him.

swtor-landing-party-uprising-guide-8swtor-landing-party-uprising-guide-7

Trial and Error

Working from a hidden space station lab, a rogue group of Republic scientists led by Doctor Alirra Semhess has developed an experimental adrenal. The adrenal, code named RS-33, radically augments a subject’s strength and agility at the expense of mental faculties. Left unchecked, Doctor Semhess and her colleagues could mass-produce RS-33 and create an army of unstoppable abominations to wreak havoc across the galaxy.

  • Note that the storymode and veteran mode of this uprising seems to be identical (HP, damage etc) so there is no point doing the storymode of this uprising except for achievements.

F96E2C85392E93DF

Marlon Fenn

  • HP: 867k (story), 867k (veteran)

Mechanic

  • Spawns 8 Marlon Maulers and a couple of droids right off the bat that hit very hard. These need to be killed off quickly to reduce the incoming damage.
  • Has an Anger mechanic. He will gain a stacking buff as he receives damage. Once this buff reaches 10 stacks, Marlon will start shooting fire circles at the ground.

swtor-trial-and-error-uprising-guideswtor-trial-and-error-uprising-guide-2

Rakghoul Transformation

If you like to transform into a Rakghoul, you can do so in this Uprising. There is a button you can click after defeating all the mobs in the room. This will transform you into a Rakghoul with 4 skills. There are three forms of Rakghoul (heal, tank, DPS) and you can transform between them freely without cooldown.

It is more of a gimmick than a combat enhancement but it is fun to play around for the first couple runs. Here are all their abilities.

swtor-trial-and-error-uprising-guide-3swtor-trial-and-error-uprising-guide-5

Icarr Ko and Nyris Ko

  • HP: 434k (story), 434k (veteran)

Mechanic

  • Fairly annoying fight with two stages. First stage both bosses are snipers with long ranged Exterminate attacks that show up as a long rectangular beam. They hit pretty hard so try your best to avoid them.
  • In addition to the waves of Rakghoul adds that spawn, there are also traps all over the room. They are these very thin beams that are very hard to see. If you tough the beam and trigger the trap, you will get stunned, which primes you to get hit by the Exterminate attacks from the snipers or get mauled by the rakghouls.
  • Once you defeat them in sniper form, they disappear in the next room and turn into Rakghoul form. This is just a tank and spank fight from this point on.

swtor-trial-and-error-uprising-guide-6swtor-trial-and-error-uprising-guide-7

Alirra Semhess

  • HP: 832k human form (story/vet), 1.36 mil rakghoul form (story/vet).

Mechanic

  • She will be shielded at start of the fight. To remove her shield, you need to destroy the four panels on all 4 sides of the room surrounding her. ZA-99 Mines will move around to prevent you from touching the shields so you need to kill them.
  • In human form all of her abilities can be interrupted, the main thing to interrupt is Toxic Bomb which covers a fairly large area with poison DoT.
  • Kill any Rakghoul Fiend adds that spawn
  • Once she turns into Rakghoul Form, laser circles will spawn all over the room and move around. Dodge those and the Smash attack from Alirra.

swtor-trial-and-error-uprising-guide-9swtor-trial-and-error-uprising-guide-10

  • Robert René Dibello

    Thanks for the shoutout for finfing the Spy in Landing Party 🙂
    -Civilian

    • Thanks for letting me know 😀

  • Theho

    Great guide! Not sure if I agree Trench Runner is the fastest; Divided We Fall also seems pretty fast. But Fractured is still the fastest.
    While I wish the CXP was higher, I do enjoy the new Uprisings. The mechanics are varied and not just copy & pasted from older bosses, and they are quite challenging. Length-wise, they feel pretty similar to flashpoints to me. I’m looking forward to when they appear in Group Finder so I can queue for them from time to time.

    • Lee Hambly

      If fractured has been “fixed”, then Firefrost is the quickest I think… it was close before, but I reckon Firefrost nicks it now.

  • AshlaBoga

    “as every bit cancerous.”

    Yep, describes EC trash to a T.

  • Martin Marinov

    Few tips for Trench Runner:
    1. For the bunkers: On all of them there are small rooms where you can do very good loss pull. Its quite faster then kiting and killing
    2. For the final boss: You can do loss on adds on the back side of the tank, there is some kind of hole there. But be careful because aoe dmg there is shit…

  • Lol

    A minor typo – “cumulates” should be “culminates”.

  • Guest

    Well, the new uprisings really suck if you only have melee dps in the group.

    • Kovandor

      I don’t know, but I think nearly every uprising and operation is s*ck as a melee dps. You have to avoid a lot of ability, and because of this, your damage output is low, so u are even more useless 😀

  • Zaniel

    at the tank you can just jump on the tank heal a bit and wait till the shields gone ads won’t come if you don’t destroy the shield. THe tank will heal itself a bit but you can still kill him easily if have enough damage^^ (not really that much required)

  • Zaniel

    for Chief Engineer Penzaren you have to kill the golden droid of course but keep in mind that there are silver droids too (if killed all normal enemys die instantly)

  • hulkette

    Just to know what s the shorter Uprising we have to do solo (as fracture is still bugged and we can electrocute the 1st boss but it work randomly)

  • RandomFan

    So Makeb’s rare underground isotope is nothing more than Gethul’s p00p? Just curious

    • Darth Twinge

      LOL now I want to capture him and bring him back to DK to poop weapons of mass destruction for me.

  • Matt Man

    These are not available via group finder?

    • Darth Ji’inx

      Correct. It’s a known bug that they are working on.

      • Mer Vila

        And here I am, trying to solo one of them *facepalm*

        • Darth Ji’inx

          XP

  • Have they made any adjustments to the amount of CXP you get in these things? Do you still get more in a single PVP match then you get in an Uprising?

    Also, nothing with the new gear changes drops in these right?

  • Ahzhihod

    “Just every bit as cancerous.” Round of applause to Dulfy please, finally saying how she really feels 😛

    • abaddonsmummy

      Where did she say that?

  • K-Man

    What’s the point of doing these, really?

    • Whitedragon
    • Lee Hambly

      same point as doing anything in a game, really

      • Ben Gimson

        Most games give you rewards for doing content to give it replay value.

        • abaddonsmummy

          So you don’t get a reward for doing uprisings?

          • Ben Gimson

            I assume it’s still just command points? Hardly rewarding.

            • abaddonsmummy

              Well at the moment there’s nothing else so it’s the only reward and way to get gear beside rng set bonus.

              • Ben Gimson

                Hit the nail on the head right there 🙂

          • Lee Hambly

            Yeah, all sorts of stuff in there, apart from the decent cxp/time-spent return on them – there is lore, achieves, some decos, who knows if there is loot too… maybe… there were in a couple of the others.
            But ofc aside from all that… err… FUN? Playing with friends? Finding new ones? A Voyage of discovery?
            If all you play for is gear loots as a reward, then I am afraid you have the wrong game tbh.

            • abaddonsmummy

              I agree all i see is people on fleet shouting for fractured grind.
              Why? There is no fun in that and these are the same people swanning around on fleet showing of their tier 3 logo and for what.
              I can run HM content easily and i’m tier 1 lol and running ops/fp’s/h2’s/pvp for fun AND rewards.

          • John Kosto

            Yeah, you get crap

    • abaddonsmummy

      That’s got to be the most stupid comment on here and that’s quite an achievement.

    • Lord Cyrus

      Because its a game and its new content for you to clear and do with your mates.

  • Auron

    They should make Ben Irving grind a character to rank 300 to make him see what it feels like.

    #RemoveRNG

    #FireBen

    • Ross

      Why do you have to grind to 300?
      It’s totally unnecessary.

      • Auron

        Yeah, why grinding when you can just unsub from this utter garbage.

        • Hmmm…Auron, FF online player?

          • Auron

            I didn’t tried it yet, right now I’m playing ESO and WoW while waiting for them to remove this system, I loved Swtor but this GC was just too much.

            • WoW Legion has pissed me off because they increasing artifact spending soon and I just maxed that crap out….

  • abaddonsmummy

    These look really cool and different.
    Can’t wait for me and my guild to get stuck in about them.

    • John Kosto

      LOL

    • Darth Ji’inx

      It’s fun playing as a Rakghoul 🙂
      Now I know why Lokin does it so much XP

  • Lord Cyrus

    I’m enjoying these new uprisings.

  • DLM3

    Any tip for the Demolition Devotee achievement in Destroyer of Worlds? This damn droid just runs through the corridor past the first boss through 2 dozens of mobs impossible to clear before they hurt it… And let’s not talk about the sneaky tentacles disabling it in 2 hits.

    • Gisella

      You can heal the droid.

      • WiDe

        Indeed, setup that worked: sorc heal (good bubble) with 2 vengeance juggs and a arsenal merc. good composition for lost of aoe

    • guest

      Your group basically has to keep aggro on EVERYTHING and mow the tentacles down fast. The droid turns back, it’s basiclaly toast.

  • Has anyone attemped these in solo mode? I’m about to jump on and try it the group queue is sucking atm

    • saunterer

      I’ve soloed “Destroyer of Worlds”, it was pretty easy. The only trouble I’ve had was with Velloc & Skurr, as they need to be killed 9 sec from each other (I’m counsular/DPS). My comp was 50/healer.

      I failed on the first boss of “Landing Party” and last boss of “Divided We Fall”.

      • Noted.

      • Darth Ji’inx

        Alpha Cthon & Commander Kallin (“Divided We Fall”) requires a group with at least one healer player/companion.

    • snakedoctor

      what level companion is needed to solo these in story mode?

      • I tried it with a a maxed out level 50 companion on heals and it still wasn’t enough. I was also in the skill tree corruption (heals) but then the dps suffered and I kept getting overwhelmed. Too many mechanics (Divided We Fall Uprising)

        • snakedoctor

          I tried it with lvl 30 healer, but the silver adds on the first boss overwhelmed his healing faster than I could take them down.

  • Gisella

    Chief Engineer Penzaren guide is 100% wrong on Destroyer of Worlds. First off, the priority is kill the Eradicator droid then the one “Strong” Keeper Droid. You kill the Eradicator droid first because it spawns before the Strong Keeper Droid. Once, the Strong Keeper Droid dies, it explodes and electrifies the rest of the droids, killing them instantly. The red circle that spawns throughout the fight does not cause a DoT. In fact, the group must stand in the red circle because it gives an armor buff. It clearly says on your buff bar that you receive an armor increase when stepping into the circle. The only DoTs you receive are from the Eradicate Droid’s flame and the Keeper Droids bleed stabs.

  • Steven Huyen Tran

    I wonder how much time has passed between these uprisings and the next Iokath op?

  • Kazren OhJohnny

    Has anyone figured out how to get pass Marlon Fenn? Do we kill adds first, never attacking him at all, then all pile up on him? I’ve wiped with several groups on him.

    • Darth Ji’inx

      Adds are always the priority in “Trial and Error.” It’s also a good idea to have at least one healer player/companion in your group.

      • Kazren OhJohnny

        We did it, and just got all the adds first, but the end, with the boss turning into a Rakghoul with lazer circles all over was rediculous. We wiped in story mode, I’m ashamed to say.

        • Darth Ji’inx

          For the final boss in her rakghoul form, we managed to lure her into the corner of the room left from the entryway. The lasers don’t reach back quite that far. 😉

          • Kazren OhJohnny

            I found a spot near the end, but the rest of the team was already dead. It was a deadly room. Thanks, Ji’inx.

    • guest

      There are a finite number of adds. Have everyone hide around the corner in the hallway before you enter the room and have the tank pull and race back there to Line of Sight them. Then AOE them down all in one spot. If the adds get too spread out they can be deadly. This is a useful strategy for alot of these uprisings.

      Also for 2nd boss in trial and error, everyone can gather in hallway outside. Have sorc set phasewalk there, pull adds, then phase walk back into hallway and kill them. There are 2 add spawns, each at a certain distance you enter into the room. That way you can deal with the adds without worrying about the bosses.

      • Kazren OhJohnny

        Very helpful and common sense. Thank you.

  • Darth Ji’inx

    @dulfy:disqus

    Is “Trial and Error” still the same on Story & Veteran?

  • wileydsp

    These aren’t bad by any stretch. I just wish that the whole “mob you with adds” idea gets tossed into a bin somewhere behind the barn never to be found again.

  • Magsel

    So where is that 6th relic in Destroyer of Worlds? And how do you summon the bonus boss?
    Is it only in veteran mode or also story mode?

    • Jesse Coats

      also in story mode. on the 5th shown (bottom left), it is on the crate opposite of it or at least behind crate

      • MattStriker

        A word of warning: If you’re doing this with a typical storymode party (i.e. 4 DPS), do not trigger this bonus boss unless you are absolutely certain that everybody in your party knows what they’re getting into. It’s hellishly difficult without a dedicated tank and healer.

      • sentientomega

        I’ve checked, it’s not there, so we couldn’t get the bonus boss, since only 5/6 gained.
        Could they’ve moved one?

  • guest

    For those interested in the achievement for keeping the droid alive in Destroyer of Worlds, you can glitch over the forcefield just before penzaren and kill 3 sets of mobs (2 that are spawns) to make it easier. We duo’d it, and both got up on that beam in front of the force field. Then dueled and he jet boosted me over. Took a few tries but eventually i glitched through. Then me and my companion took out the 3 sets of mobs and i phase walked back (sorc) and killed the boss. There are still spawns, just not as many.

    Takes some luck though as its ridiculus the thing dies in 2 or 3 hits, it basically has to reach its next invlulnerable point without drawing any aggro. I also had a dps companion.

    Then for the 3rd phase after you kill the 2nd boss, make sure you are all in the hallway with the bosses, and that on one goes near the droid after the fight. You can then take your time clearing a path killing all the mobs before you go back to fetch the droid. Achievement pops after droid blows up the squid.

    Also a trick for hard mode (I refuse to say veteran), if you have a sorc/assassin you can force speed+jump up on top of the console.on the right wall as you enter the room. Then pull your group members up there (as a sorc). None of the melee adds or eradicator droids can get you up there, makes it much easier to heal.

    • guest

      *no one goes near droid after the fight

  • WiDe

    Any update on the Master modes? Destroyer of Worlds first boss does a silence stun for like 1 minute …

  • snakedoctor

    Can these be soloed in story mode?

    • Leont Stepanov

      Some of them, easily. But last boss of Divided We Fall is pretty much impossible as companions don’t move out of aoe.

      • snakedoctor

        Which ones, may I ask?

        • Leont Stepanov

          Firefrost, Inferno, Done and Dusted I definitely soloed. Not sure if tried anything else.

  • yellow-power ftw

    any idea about the new achieves in trial and error ? any guide for how to finish them? ”deep-fry deelight” and ”mutagenic mayhem”

  • srtäää

    So, the Story Mode of Trail and Error is actually harder, because in Vetean you have a Tank and a healer, in Story Mode you may be 4x DD.

    As always, great work, BioWare! You put out a bugged load of crap and never fix it! That’s the quality we are used to!

  • Secundum

    Divided we fall is EASILY the worst content SWTOR has made so far. The 2nd boss has such stupid mechanics…

Back to Top