SWTOR Hardmode Quartermaster Bulo Ravagers Operation Guide by Zorz
SWTOR Hardmode Quartermaster Bulo Ravagers Operation Guide written by Zorz guild of Harbinger.
Contents
Basic Info
Gear Recommendation
- 186 Dread Master gear with some 192 (Resurrected) mixed in is sufficient.
Health
- 3.80 mil (3804838)
Enrage
- Unknown
Loot
- 1x Unassembled Revanite Headgear (198)
- 1x Random Deceiver gear (198, no set bonus)
- 1x Exonium (crafting mat)
- 6 Ultimate Commendations
- 8 Elite Commendations
Basic Overview
Quartermaster Bulo is the second boss of Ravagers and is a significant step up in difficulty. Much like the Sword Squadron Units In ToS, this fight has some substantial raid damage and requires good mobility. The two tanks need to position Bulo and maintain the highest and 2nd highest threat on him to prevent his frontal telegraphs from cleaving the raid. When Bulo summon Drunken Pirates, they need to be taken care of by having one tank using a Barrel and dragging them into the Volley circles. Every other spawn of pirates can be handled by Mass Barrage. Watch out for Bulo’s Barrel Throw and Load Lifters/Unstable Carts that come to the raid and tanks respectively.
Differences from Storymode
The pirates on Hardmode have too much HP to be killed manually so they should be killed via Volley and Mass Barrage. There are now two Load Lifters instead of one, and four additional adds called Exonium Carts that spawn at the same time. The most significant difference is that overall raid damage is higher and the fire barrels hit quite hard (still with no cast time), so there must be a focus on topping off the raid, as well as avoiding taking excess damage from the adds and cleaves.
Boss Abilities
| Ability | Damage Type | Damage Source | Damage | Cooldown |
| Barrel Throw | Elemental | AoE | ~25-30k | 10s |
| Volley | Energy | AoE | ~18-25k per tick | 18s |
| Exonium Cart | Kinetic | AoE | ~8-12k | 45s |
| Load Lifter | Kinetic | AoE | ~15-20k | 30s |
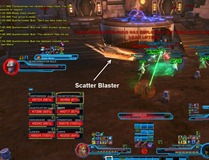
| Scatter Blaster | Energy | Frontal | ~4-5k x5 | |
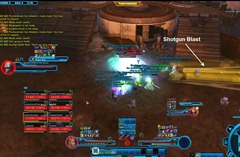
| Shotgun Blast | Energy | Frontal | ~5.5k x5 | |
| Mass Barrage | 60s |
Add abilities
| Ability | Damage Type | Damage Source | Damage |
| Ranged Attack | Kinetic | Direct | ~1k x6 per second |
Mechanics
Shotgun Blast
This is an occasional cleave on the main tank used in Bulo’s rotation that does a substantial amount of damage.
Scatter Blaster
This is the repeated cleave attack that hits multiple times per second for several thousand damage per hit. Bulo does this attack on the top two targets on his aggro table. To prevent extreme raid damage, these targets must be the two tanks.
Drunken Pirates
This fight is all about controlling Drunken Pirates. You do not want to manually kill the Drunken Pirates as they spawn way too often and have way too much HP. Instead, you want to utilize Volleys and Mass Barrage to help kill them. Four of them spawn every 45 starting at 20s into the fight.
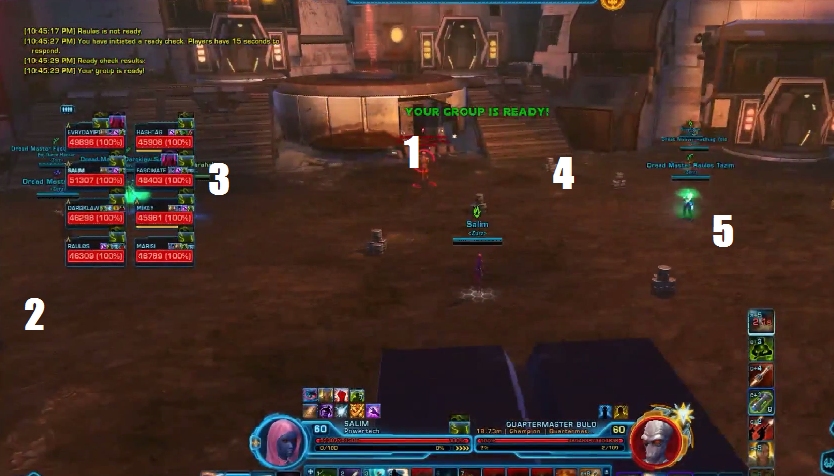
Drunken Pirates spawn from one of three locations in the room, depending on where Quartermaster Bulo is. Quartermaster Bulo have a tendency to jump to 5 locations.
- Spot 1 in the diagram is where he resides by default. If he stays at Spot 1, the Pirates will spawn at the top of the platform.
- Spots 2/3 in the diagram are his left jump spots. If he stays at one of these spots, the Pirates will spawn either on the same side or on top of the platform.
- Spots 4/5 in the diagram are his right jump spots. If he stays at one of these spots, the Pirates will spawn either on the same side or on top of the platform.
Load Lifters
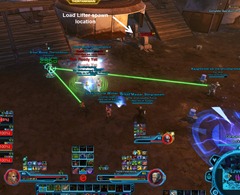
A pair of Load Lifters comes out a time, targeting a random member of the raid group and exploding when they reach that person. There is no way to prevent this explosion so it must be mitigated.
Exonium Carts
These exclusively target whoever has main threat on Bulo. They do not damage you if they pass by you, but they do explode for AOE damage so no one should be within about 5-10 meters of the tank who takes them.
Barrel Throw
This attack does 20k-30k damage on Hardmode depending on your class and can be thrown randomly and instantly onto any target. Use cooldowns preemptively if possible (such Saber Ward, Entrench or a medpack) if you feel you are very low on HP and a fire barrel will be thrown soon. Note that the Fire Barrel leaves a fire animation on the ground, but this doesn’t actually hurt you so don’t change up your positioning out of panic! There’s no reason to not stand in the fire animation if that’s the most convenient place to be.
Barrel Carry
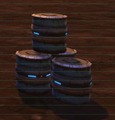
The barrels that you see around the room can be picked up and cause you to be ignored by Bulo, but gain aggro on adds when you run into melee range of them. They do not need to be picked up by non-tanks (except perhaps in emergencies) and in fact should not, as they prevent DPS/Heals from doing their main job.
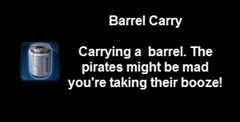
Picking up the barrel will give you the Barrel Carry buff for 18s. This buff prevents you from using any abilities but you can click it off anytime you want. On Hardmode there is also an Exhaustion debuff lasting for 2 minutes that will be applied if you try to pick up another barrel after. This debuff reduces so accuracy so there needs to be a tank swap for the other tank to pick up the second barrel. The Barrel Carry buff makes the pirates stop their range attacks and follow you around.
Volley
The Volley circle is cast onto a random player outside of melee range of Bulo. It starts purple and follows around the player around, then turns blue after 2 seconds (at which point it is “placed” and will no longer follow the player). Volley circles remain on the map for a long while (45 seconds) unlike the mass barrage circles which are only briefly usable to kill adds.
It should be noted that anyone who steps inside a Volley circle takes massive damage per tick. Therefore it is important to move out of Volley as soon as it is placed. Also, tanks must be careful not to clip Volley as they kite adds into it. In general, the raid group should be instructed to avoid placing Volley circles very far from add spawns. This will reduce the damage your raid and/or tanks take since adds will die quicker when they can be quickly kited into the Volley circles and the tanks do not have to run in front of the raid, potentially cleaving everyone for massive damage.
Mass Barrage (transition)
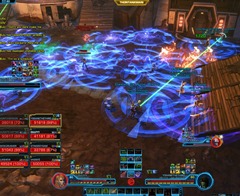
Every Barrage phase, each member in the raid drops circles behind them for about 10 seconds. After a few seconds, each circle begins to pulsate and cause damage if you step inside it. Barrage circles cause any Pirate adds inside them to be killed, but are also dangerous for the rest of your raid.
Strategy
Pre-fight
- The first 15-20 seconds of the fight are very low on damage so healers should be DPSing as much as possible in order to shorten the fight. This is generally true of most fights, but especially valid here, and is good practice here on Hardmode Bulo.
- Assign two DPS to cover the left/right sides of the room during Mass Barrage (ideally these are ranged players to minimize movement). This is done because Mass Barrage can kill Pirate adds where they spawn (this is the easiest way to deal with them), although this is not always possible to do due to the timing of the add waves. One of the tanks can run Mass Barrage to the top platform while the other remains on the main boss.
- Use the two DPS that cover the left/right sides of the room to drop Barrage circles on or near the add spawns to make life easier for the tanks. When the tanks have to go to the add spawns on either side, or kite adds near a Barrage dropped on those locations, the DPS in that general area should be prepared to shift a bit towards the middle to avoid getting cleaved.
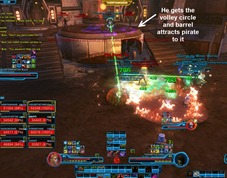
- We like to have some of the raid on each side of the boss at the beginning in order to drop the first Volley (purple circle) at the bottom of the stairs just as the first Pirate adds spawn on the top platform. Tank swap around 15 seconds in, have the initial tank pick up a barrel, and then walk to the top platform to gather adds and kite them to the bottom of the stairs on either side, depending on who dropped the Volley circle.
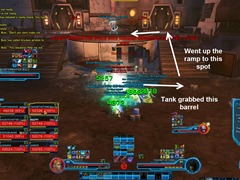
- Alternatively you open as follows: have the raid stack in within a few meters of the boss until the first Volley (purple circle) goes out. Tank swap shortly before the Pirate adds come out (around 10-15 seconds into the fight should be adequate time), have the initial tank go pick up a barrel, and then run to the top of the platform. This tank should get aggro on the adds and then also receive the Volley since he is the only one outside of melee range of the boss.
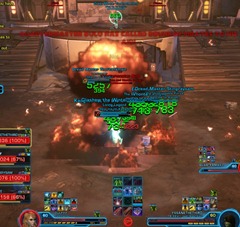
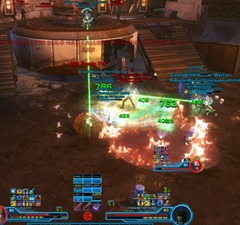
This last strategy is outlined in pictures below and is a nice way to get the best opening possible:
Note that the fight follows a fixed sequence:
- Main phase. The first set of adds spawns at the beginning of this phase.
- Mass Barrage #1. The second set of adds spawns during the end of this phase.
- Main phase. The third set of adds spawns during this phase.
- Mass Barrage #2
- Main phase. The fourth set of adds spawns during this phase.
- Mass Barrage #3. The fifth set of adds spawns during the end of this phase.
- Main phase. The sixth set of adds spawns during this phase.
- Mass Barrage #4 (if boss still not dead).
- Main phase (kill boss prior to enrage). The seventh set of adds spawns during this phase.
There is an opportunity to use Mass Barrage to kill adds during odd numbered Mass Barrage (1,3,5, etc.) If you miss your chance or the adds are a bit delayed, immediately use a barrel to aggro adds and kite them into a Volley circle.
General positioning (should be shifted to give tanks room – whatever kills the adds ASAP and doesn’t cleave the group is what you want to be doing):
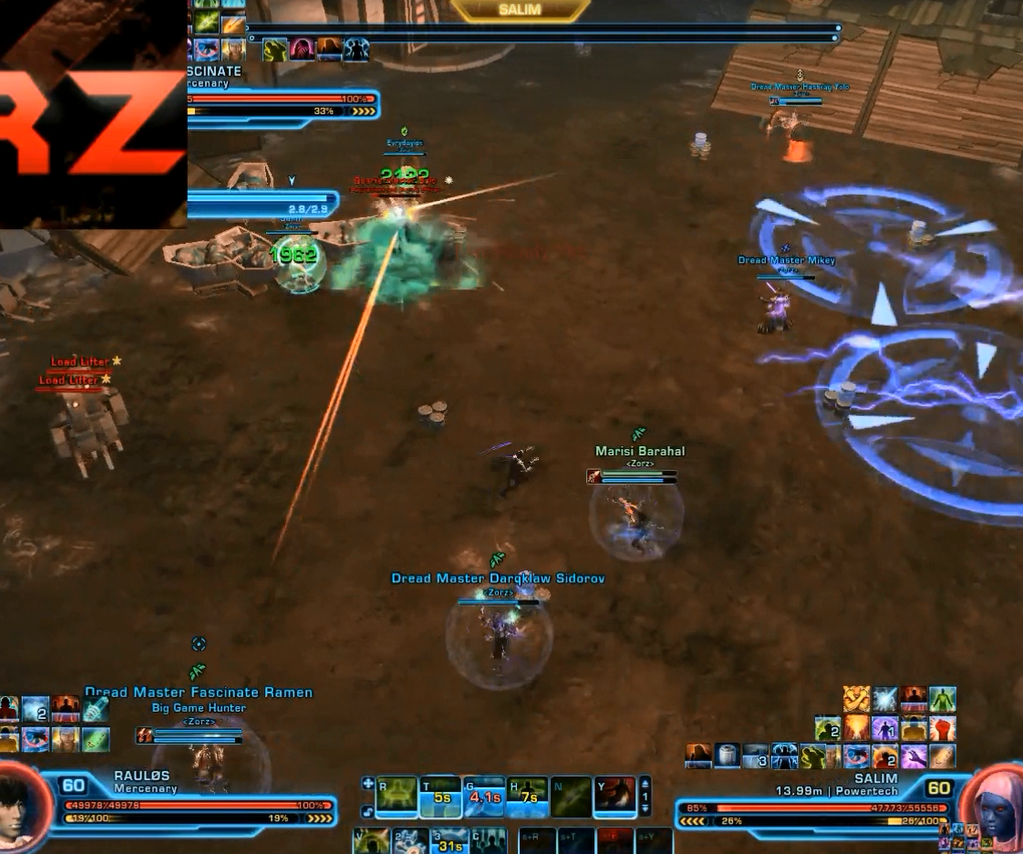
A few things to note:
- The tanks are given the “stage side” with the raised platform as a definite safe zone to point the Scatter Blaster cleave towards. The raid should aim to never be on this side for any reason.
- The raid should stand on the opposite side of the tanks, slightly spread out if possible, with some DPS/heals near the left/right sides to try to drop Volley on adds.
- Although we have no MDPS in this run, note how the raid consists of two tanks opposite a line of RDPS/heals. We could be slightly more grouped for AOE heals if needed, but this generally this is a fight with large amounts of single target healing.
Main Phase
In the main phase of the fight, you attack Bulo at one of his various positions while looking out for Pirates.
Periodically Exonium Carts will come out and head for the tanks, while Load Lifters aggro on to random raid members in the group. This does not always happen at the same time since Load Lifters are on a different timer.
Always use a cooldown if you notice Load Lifters heading your way. Every class has several cooldowns or at least a medpack, so there is no excuse to die to them without any mitigation up. It is occasionally possible to be hit by a fire barrel when the Load Lifters explode, so try to take the Load Lifter damage as soon as possible to reduce the chance of this occurring.
Tanks: Whenever adds spawn, or are about to spawn, the main tank should be looking for the Pirate spawn location as well as any Volley circles around the map. Have the off tank pick up the boss, then pick up one of the barrels lying around the map and then go into melee range of the adds. Then walk around to the opposite side of one of the Volley circles and let the adds kite themselves into the Volley. They should die within several seconds if this is done properly.
During this phase tanks should swap off each other as often as taunts allow in order to generate the highest amount of threat possible. A very good place to taunt swap is whenever adds come out. The tank with aggro on Bulo should go pick up a barrel of beer and get aggro on the Pirate adds while the off tank takes the boss. As soon as this is done, tank swap again as long as the tank who just kited the adds is not too low on HP to take primary aggro.
Note that if you have the beer barrel and it is your job to collect adds, you can click off the buff as soon as you run into melee range and aggro all the adds. This lets you use your defensive cooldowns and other skills appropriately.
If possible you can tank swap to avoid too much damage being directed to the main tank when the Carts hit, but it isn’t really necessary since there should be plenty of warning to heal the tank. Whoever is taking the Carts should try to back off from the boss (since he does not follow you and stands in fixed locations) in order to prevent the MDPS from having to stop DPS on the boss to avoid the explosions. Also, you should aim to use a cooldown of some sort every time you take Exonium Carts to help healers.
Tanks absolutely cannot let the cleaves start aggroing onto the raid. Since Bulo’s mechanics repeat frequently, use your cooldowns often unless the raid is already very good on health and do not just save them for when you are already extremely low on HP from mechanics. This way your cooldowns will come back later in the fight instead of being a few seconds away when your raid wipes.
In general, never stand next to or behind any member of your raid group. Generally keep yourself separated and either on one of the sides of the map, or on the platform side of the map. Only walk in the middle if it is your only choice (adds have spawned, it is not time for Mass Barrage, and they must be kited into a Volley circle at mid).
DPS: You have a very simple job in this fight: kill Bulo. Ignore the Pirate adds and focus on using your cooldowns and positioning appropriately to avoid taking damage. DPS should be dropping threat as often as possible beginning once all taunts are have used up at the start of the fight. Don’t prematurely aggro drop since tanks can potentially use DPS opening threat to boost themselves for the rest of the fight. Do not stand on the platform side of the map. Pay attention to where the tanks are. They need to control the adds so it is your responsibility not to walk in front of them.
Although the tanks should be kiting Exonium Carts away from you so that it doesn’t affect your DPS, it is your responsibility to move out of the way if the tank doesn’t have a choice (or even if the tank forgets to move away, you should never be hit by the explosion!)
Heals: Your primary job is keeping the tanks alive through massive damage. Don’t allow yourself to fall behind since tanks can take spikes from the repeated Scatter Blaster cleave, Pirate adds or from Exonium Carts, which aim for the main tank and deal a large amount of damage. Your secondary role is to make sure anyone below around 2/3 HP is topped off in case they are targeted by the random fire barrel attack. Rotate between tank healing and raid healing priority depending on what is happening in the fight. Remember to DPS for the first 15-20 seconds of the fight in order to push the boss slightly faster.
For example, if a Fire Barrel was just thrown, your priority is not to top off the raid in case of Fire Barrel. You should be spam healing the tanks instead. If Load Lifters and Exonium Carts come out, you should be focusing your heals on the target of the Load Lifters (who will take massive damage without a cooldown), followed by the tank about to take the Exonium Carts. As soon as you ensure these people survive, swap your heals back onto random raid members to ensure they won’t die to a fire barrel.
Pay attention to which tank has the Exonium Carts aggroed and top them off before the Carts hit. Then swap back to making sure the raid is at good health.
Mass Barrage
You don’t immediately take damage from standing in the Mass Barrage circles so don’t worry about lingering in your own circles for 2-3 seconds other than making sure the three add spawn locations are covered. There is no need to spread out circles randomly and far apart so stack them near each other. Do not walk into other people’s circles if they have been already placed for a few seconds. These circles do a lot less damage than the single Volley circle. Try to continue to do some DPS/heals during this phase because it will help you catch up for the main phase.
After Mass Barrage, the raid should group together for AOE heals if multiple people are low are health, then return to normal positions.
Class-Specific Tips
Guardian/Juggernaut
- Saber Reflect works to negate all damage from Load Lifters.
- While tanking, the increased Saber Reflect duration is long enough to reflect all Scatter Blaster attacks.
- If you have the beer, as soon as you aggro all the adds, you can simply click off the buff and use your Saber Reflect. If you time it especially well, you can reflect all the damage from the adds and the Scatter Blaster attack at the same time.
Sentinel/Marauder
- Force Camouflage, Saber Ward, and Guarded by the Force/Undying Rage are excellent for taking damage from Load Lifters.
- A well-timed Predation can help your tank kite adds into the Volley circle, although only do this if asked for. Extra Predation when not needed can be annoying in this fight.
Sage/Sorcerer
- If you are a DPS Sage/Sorcerer, and you have no Sage/Sorcerer healer, you should occasionally use your Force Armor/Static Barrier to protect the main tank just prior to taking the Exonium Carts, as well as on low HP raid members who are at risk of being one-shot by the Fire Barrel.
- The Masterful utility that grants 25% damage reduction from Cloud Mind, combined with a Force Armor/Static Barrier, is excellent for taking damage from Load Lifters.
- Also, you can temporarily force Load Lifters to deaggro via Force Barrier. This will either make them explode on someone else nearby (possibly a good idea if you warn them) or return to you when you leave Barrier. However, when you leave Barrier, you may be higher on HP and you will additionally have the defensive benefits of going into your Barrier.
Shadow/Assassin
- Resilience/Force Shroud can be used to resist all damage from Load Lifters.
Gunslinger/Sniper
- Hightail It/Covered Escape can be used to roll Load Lifters.
- Alternatively, Hunker Down/Entrench with Shield Probe will prevent almost all damage from Load Lifters.
Scoundrel/Operative
- Scamper/Exfiltrate will evade all incoming damage for 1.5 seconds and can be used to avoid all damage from Load Lifters.
- 30% stronger Defense Screen/Shield Probe and 20% damage reduction from Pugnacity/Stim Boost (Heroic utilities) are both excellent ways for Medicine or Lethality Operatives to handle Load Lifters if not completely topped off on health.
Vanguard/Powertech
- Reactive Shield/Energy Shield is an excellent cooldown for taking Load Lifters as well as reducing damage taken if you must take Scatter Blaster for any reason
- All of the bonuses to Hold the Line/Hydraulic Overrides are fairly essential for a tank Vanguard/Powertech. As a DPS they are less important.
- DPS Vanguard/Powertech is very good to pick up beer barrels to leave the tanks more time to work on their aggro if maintaining top 2 threat is a problem for the tanks. This slows down DPS on the boss but can help raid survivability if needed.
- Use your AOE taunt to either shield tanks for Scatter Blaster or raid members for Load Lifters.
Commando/Mercenary
- Reactive Shield/Energy Shield is an excellent cooldown for taking Load Lifters as well as reducing damage taken if you must take Scatter Blaster for any reason
- If you are a DPS Commando/Mercenary, your Emergency Scan is a nice quick heal to throw on a tank or a low health raid member taking Load Lifters. If your healers are a little behind or the raid has taken excessive damage, this is an easy way to help survive a tough part of the fight.
- Since most attacks consist of AOE damage, the Heroic utility to take 30% less AOE damage is worthwhile for this fight.
Advanced Strategy/Video Discussion
Tanking Overview:
In this video, one of our main tanks (Smugglin) outlines the Quartermaster Bulo HM fight from a tanking perspective.
Heals Overview: In this video, one of our healers (Raulos) outlines the Bulo HM fight from a healing perspective.
Full Video PoVs
Tank PoV (Shieldtech Powertech):
DPS PoV (Virulence Sniper):
Healer PoV (Bodyguard Mercenary):
16m Healer PoV (Corruption Sorcerer):


