SWTOR 5.0 Seer Sage PvP Guide by Andunie Anzu
SWTOR 5.0 Sage Seer PvP Guide written by Andunie Anzu.
Contents
Intro to Seer Sage
I created this guide because I love this class and I want to share my two years knowledge with everybody. I’ll try to explain everything from skills and gear through survival to positioning. I hope that many of you will try this class and enjoy playing it like me. It’s not so hard to enjoy Sage, you will see! It’s only PvP guide because my experience in PvE are only 2m Hard Flashpoints and a few SM Ops. This guide is made to help you a little, other healers can have different opinions for gearing and utilities but I accept them all. If I find that I missed some of the informations, I’ll try to add it in the future.
Definitions
- LoS – Line of Sight (when somebody sees you and can attack/heal you)
- HoT – Healing over Time ability (ability which heals target over time, not while casting or instantly after cast)
- HPS – Healing Per Second (average amount of healing you did every second)
- CD – Cooldown (time which must end before you can use same skill next time)
- DCD – Defensive Cooldown (your defensive abilities)
- GCD – Global Cooldown (1.5 second – it’s time which must end before you can use any ability, GCD can be shorter if you have Alacrity, some skills and items can be used out of GCD)
- AoE – Area of Effect (in this area you can be affected by ability, AoE abilities are this one which affect more than one player)
- DPS – Damage Per Second (average amount of damage you did every second)
- DoT – Damage Over Time (ability which damages target over time, not while casting or after cast, for example: bleeding, acid)
- CC – Crowd Control (stuns)
- Hardstun – Stun that doesn’t break on damage taken, for Sage it’s “Force Stun"
For people who are completely new to MMORPGs:
Stun – When You are stunned it means that you are unable to move, attack.
Advantages
- Very, very mobile
- Powerful defensive abilities like Force Barrier and Phase Walk
- Nice abilities to help your teammates survive like Rescue, Force Armor
- Easy to Play
- Very versatile
- Not so hard to be killed while stunned like other healer because of two strong defensive abilities
- Can heal somebody to almost full in a very short time
- Force regeneration isn’t affected by your current Force level
Disadvantages
- Gets the highest hits out of any class (even 20-30k from classes like Focus Guardian, Concentration Sentinel, Gunnery Commando…)
- After 4.5 HPS is affected by how you manage your Force
- Most affected by Electro Nets, without breaker you can die easily with Net
- Your AoE healing abilities has long cooldown so when many of your teammates has little HP, you must change target a lot of times
Patch Changes
Changes to Sage Seer in 4.0:
- You got Phase Walk which is very good surviving skill.
- Critical and Surge Rating were merged and now you need only Critical Rating.
- Aim, Willpower, Cunning, Strength were merged into Mastery.
Changes to Sage Seer in 4.5:
- You abilities started to cost about 25-30% more Force. Playing was harder for new players, but experienced players could still manage with it.
Changes to Sage Seer in 5.0:
- Abilities costs a little less than in 4.5 but still more than in 4.0. Vindicate restores 10 less (40 down from 50).
- Force Speed’s CD is 10 second shorter (20 down from 30)
- Phase Walk’s CD is 15 second longer (60 up from 45) but can be shorter with Utility.
- New 68 lvl Passive (I’ll explain this later).
- 10% improvement to Force Armor is given to Sage Seer’s tree so now you don’t have to worry about losing Utility point on it)
Overall changes to PvP in 5.0:
- Expertise was removed from the game.
- Expertise Crystal was changed into Mastery Crystal. Remember to replace them with Critical Crystals.
- There is no Warzone Commendations (old ones was changed into credits) and you can get best gear only from Galactic Command (see this guide: http://dulfy.net/2016/11/29/swtor-galactic-command-guide/). You aren’t able to buy your gear from Vendor.
- There is the same gear for PvP and PvE.
- You need new augments for PvP and you need to upgrade you slots to MK-10 version to place them.
To sum up, Sages in PvP are very powerful, easy to play and if you know how to change target you can help you whole team to stay alive. While Scoundrel can do more healing when many targets have lower HP level ( I saw one Operative which do 13,5 HPS in Odessen Proving Grounds and I thought just ,”WOW!"), you can make you look better because of ,”toys" like Force Armor. I mostly do 9-10,5k HPS in single fight as Sage when I heal most of the fight. And while other healers in my opinion are better than their was in previous expansions, Sage can still be the best in Surviving. Biggest problem in 5.0 is that there are millions of Commandos now because they are very good. Millions of Commandos = Millions of Electro Nets. You have to be veeeery careful.
What’s more, Sage is only Jedi healer, only Republic-side healer with Force. If someone loves Force characters like me, you will understand.
Utilities
5.0 came with big changes to Utilities. Now you can choose 1 more skill in your Combat Proficiences. Levels to unlock skills are: 14, 22, 30, 38, 46, 54, 61, 70.
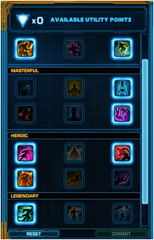
Biggest change is that now you have four tiers of Utilities (Skillful, Masterful, Heroic and Legendary) instead of three. You must give two points to advance to next tier. Of course, you can choose three utilities in previous tier and then one in higher. For example to unlock Heroic tier You can give 4 points to Skillful and 0 to Masterful.
My personal preference is to choose one tree for all kind of PvP which I will attempt. Why? Because I choose abilities which help me both heal and survive. I see them all matching both with tanks and without them. As for new players: If you learn to play with abilities which you will as experienced player, you won’t have to change your habit. And in Regular Warzones: If You can play your character, it’s much better to have Utilities for Regular Warzones Arenas because in 8vs8 you can heal even without Utilities (I’m just joking, never go without Utilities, please!). But as I said, it’s my personal preference and I don’t argue with people who change them after every fight.
Utilities I choose:
Why did I choose them?
Skillful: In this tier I don’t see any more valuable Utilities.
I didn’t take this utilities:
Masterful: Here are some nice and interesting survival utilities but I got the strongest ones in my opinion.
I didn’t choose:
Heroic (I took three Utilities in this tier):
I didn’t choose:
Legendary: (I took one Utility here, but you can think about this two instead of Metaphisical Alacrity if you want):
I didn’t choose:
Gearing
Relics: Focused Retribution (Mastery relic) and Serendipitous Assault (Power relic). – Always and always. Don’t think about other ones because:
- Ephemeral Mending – You can add much more healing than 2k with Power and Mastery ones.
- Devastating Vengence – You should have enough Critical from your armor and it gives Power and Mastery more value.
- Any other relic is a joke because it gives defensive stat or you can’t use it in Warzones.
Don’t try to take two same relics because their procs will not stack.
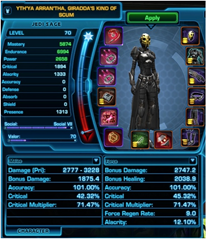
My out-of-Warzones gear gives me this stats (I’m very unlucky so it’s not full 230 gear, but it gives nice show of how you should split you Alacrity and Critical Rating):
And my stats while inside Warzone:
STATS
Accuracy Rating
Chance that you attacks will successfully hit/affect the target. Accuracy over 100% reduces the target’s resistance/defense.
NEVER TAKE ACCURACY AS HEALER! Your heals cannot miss and you won’t attack enemies so you don’t need this stat.
Alacrity & Critical Ratings
It’s your personal preference how much Alacrity and Critical Rating you’ll give to your character. But in 5.0 you can easily get enough of both of them. Try having at least listed amounts. Personally, I prefer having higher Alacrity so I’ll try to add Alacrity with better equipment.
Alacrity: Increases the speed in which abilities are executed.
Biggest advantages of Alacrity is that it gives reduction to Global cooldown. 0,2 second doesn’t look to be much but in dynamic PvP environment this 0,2 second on skill can safe your ally.
Try having at least 10% Alacrity/1100 Alacrity Rating out of Warzone. In 4.0 10% in Warzone was more than enough for me but today you have more stats so you can make yourself better.
If you are playing by clicking most skills with your mouse, go for much more Critical than Alacrity because you won’t unlock Alacrity’s full potential.
Critical: Critical increases both the chance that an attack will deal increased damage, as well as the amount of that increased damage.
You should have at least 45% Critical Chance/1850 Critical Rating (and 5850 Mastery) but as Sage, with best gear you can get about 47% out of Warzone.
Augments: Split between Advanced Alacrity Augment 45 (+96 Alacrity and +65 Endurance) and Advanced Critical Augment 45 (+96 Critical and +65 Endurance) to get recommended stats.
Personally, I’m not very keen on Power builds for healers because when Critical was merged with Surge in 4.0, Critical got more… power than Power. In my opinion, you can get better HPS results while using Critical/Alacrity Rating.
Don’t think about taking Mastery augments, they are even less powerful than Power.
Note: When you do augments slots with low-level character, do MK-10 slots. It will make it easier in the future.
Power & Mastery
While Alacrity and Critical are more important than Power and Mastery, you still will get them from gear and they are also important.
Power: Power increases the damage and healing bonuses added to abilities.
Mastery: Mastery increases your apptitude in combat. (Critical Chance (not Multiplier) + Healing Power + Damage Bonus)
You will get enough of them from gear and datacrons.
EQUIPMENT
Mods and Enhancements:
NEVER TAKE DEFENSIVE MODS AND ENHANCEMENTS for healers! Don’t try taking high Endurance one for Sage, stronger healing is your better chance to survive than more health. And remember not to take Accuracy in your Enhancements.
Mods: Lethal Mod X (unlettered one)
Enhancement: Adept Enhancement X (for more Critical Rating) or Quick Savant Enhancement X (for more Alacrity Rating)
Armorings:
Set Bonus is bonus you always want to have. Even if you have old gear with set bonus, armorings from that gear will be better. Set bonuses are tied to armorings.
Remember: Old 204/208 gear’s bonus is now the same as 230-242 bonus so you can have for example 4 208 armoring and 2 230 armorings and you will have full bonus. If you have 174/168, bonuses don’t match.
For Sage healer, there is no reason to mix gear bonuses from previous or differents set because bonus from 6-pieces is the best.
Set Bonus:
2-piece: Activating a healing ability has a 15% chance to grant Force-Mystic’s Critical Bonus which causes your next Dark Infusion or Deliverance to be a critical. This effect can only occur once every 30 seconds.
4-piece: Consuming Darkness or Vindicate restore an additional 5 Force.
6-piece: Reduces cooldown of Innervate or Healing Trance by 1.5 seconds.
NOTE: You need only 6 Armorings for full bonus, so if you have better, you can have one armoring without bonus.
Implants and Earpiece:
Always choose between Adept (Critical rating) and Quick Savant (Alacrity Rating) ones. There aren’t even one else, you may consider taking.
Color Crystal:
With Expertise removed, Critical Crystal are the best. Always choose +41 Critical ones.
Their names are: Advanced ….. Eviscerating Color Crystals. Remember to place them in both offhand and lightsaber.
Gearing in 5.0:
In 5.0 you get gear from Galactic Command (see this guide: http://dulfy.net/2016/11/29/swtor-galactic-command-guide/).
Important thing: Expertise was removed from the game in 5.0!
Preparing Your Character
Stim:
Always remember to have your stim used! And my tip is to always have at least 1-2 in your inventory. You can’t imagine how fast time can go during good PvP.
There is only one stim that is good for Sage Healer (be careful, old one has the same name but it has green image – it’s worse):
Warzone Medpac & Warzone Arsenal:
This two items are your survival. They can be bought from PvP Vendors and cost 1000 credits each.
Remember to always have at least 15 in your inventory (maximum amount you can use in very long Regular Warzone fight). But I recommend to have 100-200 . It’s easy to forget to buy them and it will be painful.
More about using Medpacs and Adrenals in Survival section.
Grenades:
Good Ranked player should remember to always take grenades with him. They are perfect to safe ally in need. The best grenade is (but you can stay with blue one because stun is the same, only damage is lower):
Datacrons:
Datacrons are objects which will give you small increase in Mastery, Endurance and Presence (not useful for PvP). You can collect them around many worlds and they will give you about 150 stat bonus.
If you didn’t get datacrons, go and do it! You will spend a few hours doing them but they’re permanent so it’s worth it.
Datacrons have been Legacy-bound since 4.0 so you need only to do them on one character. Doing it alone as Sage can be easy because you can place Phase Walk along the way.
Companion Affection bonuses:
They aren’t so hard to get and what’s more you only need to do it on one character. Healing received bonus is amazing for you. You also don’t need accuracy bonus but to be honest, it isn’t hard to get so it’s good to do it.
For Sage’s companions bonuses are:
- Qyzen: +1% Accuracy
- Tharan Cendrax: +2% Healing received
- Felix Iresso: +1% Max Health
- Nadia Grell: +1% Critical Damage Bonus
- Zenith: +1% Critical Hit Chance
Passives and Abilities
Passives
Healing Abilities
You can also change Force Wave into small AoE heal with Psychic Suffusion Utility but I don’t recommend it for PvP.
Defensive Abilities
I wrote here both skills that can save my teammates and myself.
Damage Abilities
First of all, remember that you are healer. You don’t have to do damage. Do it only if your team has 100% HP and there is not possible that they’re will lose their health fast.
Other Abilities
Rotation and Preparations
Rotation
For Sage you can write rotation but in PvP enviroment your rotation will depend on current situation.
Main Rotation
Before Battle: Force Armor on every ally -> Wandering Mend
My ally is target but I can cast skill in peace:
Rejuvenate -> Wandering Mend -> Cast Salvation -> Insta-cast Benevolence -> Rejuvenate -> Healing Trance -> Benevolence -> Rejuvenate -> Deliverance -> Repeat
I’m the target and I have to run a lot:
Rejuvenate -> Healing Trance -> Insta-cast Salvation -> Insta-cast Benevolence -> Healing Mend (if under 70% HP) -> Rejuvenate -> Healing Trance -> Wandering Mend
If possible, I’ll try to hide behind object. When I’m in good position, I can cast Benevolence to heal as much as I can and save my mobile abilities when enemies get to me.
AoE healing
In PvP environments, there are many situations when your whole team will get damage. As Sage, you have only two AoE healing abilities.
Rejuvenate on target with the lowest health level -> Wandering Mend -> Salvation
After casting this skills, you must use your single-target heals and you should change your target very often to make sure that all of your allies are in safe health level.
- First target: Insta-cast Benevolence
- Second Target: Rejuvenate -> Healing Trance
- Third Target: Rejuvenate -> Deliverance
If all of them have at least 50%, try to use Force Armor on all of them in Arenas and on most affected allies in 8vs8 fights.
When you have to heal many target always use Wandering Mend (don’t use it if all of your targets have more than 85-90% HP) and Salvation off-cooldown.
My advices:
- If you have targets under 85% of their HP, in most situations use insta-cast Benevolence when it appears.
- Use Force Armor when it’s important even if you will have lower HPS because of that. 13k absorb can safe your ally and it’s more important than your satisfaction.
- Use Force Mend when our enemies are the easiest way to hit you (for example: you have 60% HP and you are rooted without Force Speed). Don’t use Force Mend when you have more health than 70-75% and you are main target. Sometimes I use Force Mend with 85% health when nobody is attacking me and I must heal another people because of it’s Off-GCD but this are rare situations.
Ok, to sum up:
Use Rejuvenate off-cooldown to make it bonuses affect you.
I mostly use Healing Trance and Wandering Mend off-cooldown because they’re perfect for my burst-healing.
My most used rotation when I don’t have to be mobile all-the-time:
Force Armor -> Rejuvenate -> Wandering Mend -> Force Potency -> Healing Trance -> Salvation -> Insta-cast Benevolence -> Rejuvenate -> Healing Trance/Deliverance
OR:
Force Armor -> Rejuvenate -> Healing Trance -> Wandering Mend -> Salvation -> Insta-cast Benevolence -> Rejuvenate -> Healing Trance -> Benevolence -> Rejuvenate -> Deliverance
To be honest, to heal good = to heal the most useful skill in chosen situation. Decide if your allies need burst or AoE healing, if they get huge burst damage and if you have time to use Force Armor on them.
Watch out for your Force level (more in Force Management!).
Remember to use your Deliverance when you get bonus from your 2-piece gear.
Prefight Preparations
To be prepared to fight = to have good beginning and advantage above worse healers. So you must always remember about preparing before fight. If your computer is good enough to load new map fast, in Regular Warzones you will have more than one minute so you don’t have to worry. In Arenas, you always have 30 seconds to prepare because 30 seconds before fight, clock appears and all used skills reset.
As Sage, you can prepare your teammates in many ways which mostly increases their defense.
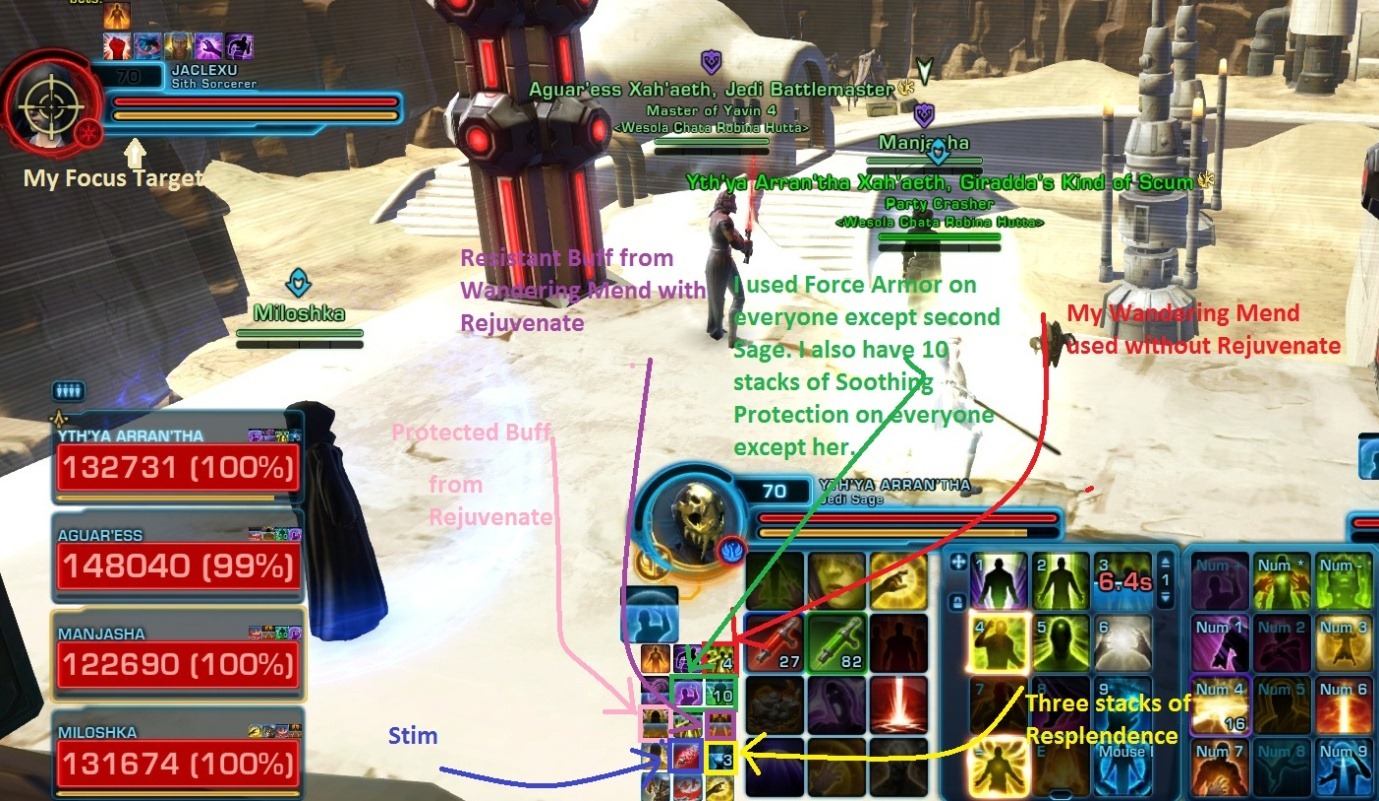
Start with using Rejuvenate on every member. Rejuvenate gives Protected bonus which increases armor rating by 10%. With Alacrity, Rejuvenate has about 5,3-5,4 seconds CD, so try to start spreading it about 20-25 seconds before fight. You should start with person who in your opinion will be last target (in 5.0 I would say that last targets are Commandos, Scoundrels and first targets are Gunslingers, Sages, Vanguards and Guardians). Protected lasts for 45 seconds so there’s no problem that you won’t have time to spread it to everyone.
You should remember to use Wandering Mend after Rejuvenate about 10 seconds before fight to give your teammates Resistant buff which increases their internal and elemental damage reduction by 3%.
Remember to get three stacks of Resplendence. It will allow you to start fight with insta-cast Salvation and increase your HPS.
If you are good in observing many things at one moment, enable Focus Target in Preferences. Then remember to set Focus Target on enemy who will be attacked first. If you don’t know who will be attacked first or if there’s Hardswitch, use it on healer.
You can also put a target market above your head. You can do it by choosing option Target market on yourself and one of the images. Don’t put target and fire, they’re for enemies. You can use shield if there’s no tank or lightning for example.
A moment before time ends, use Wandering Mend without Rejuvenate on ally who will be first target in your opinion. Wandering Mend will be used and you will have its cooldown refreshed before you get to enemies.
And the most important thing: Give Force Armor to everyone in your team! It’s the best defensive skill, you can give to them. just don’t give it to another Sages because it’s possible that they have bonuses to their own Armors. In 5.0 remember to give bubble when whole your other buffs are already given because you can lose stack of Soothing Protection and your Force Armor will have worse healing.
Even before the time appears, remember to check if you have your main buff applied (here my advice is to level up at least one character of every base class to get all 4 buffs and don’t wait for others to give it to you). and check if you have your Stim used with at least 18 minutes CD (3x Round which ended in Sudden Death). Also check if you have enough Warzone Medpacs and Adrenals. You have time to buy them before the fight.
Last thing is that you should target person who are about to be the first target. I would say that for DPS classes it’s like this:
Vanguard -> Guardian -> Sage -> Sentinel -> Gunslinger -> Shadow -> Scoundrel -> Commando but to be honest, every fight is different and someone can be worse and be attacked as first or healers are often first targets.
Force Management
After 4.5 Patch, Sages have to be more aware of their Force.
REMEMBER: Healing/Saving an ally is always more important than your Force management.
If Rejuvenate + Wandering Mend will safe your ally but you will run out-of-Force do it. You will get it back and your team won’t be weaker.
Force Management rotation:
Rejuvenate -> Healing Trance -> Vindicate(x3)
Don’t delete Amnesty buff if you don’t really have to. Faster Force regeneration = less Vindicates in the future.
If you can cast Salvation and your allies have enough HP, you can try to have Amnesty buff very often.
Don’t use Vindicate without Resplendence or at least Amnesty buff. You will get Weary debuff and it can be dangerous for you because you have to use next Vindicate with Resplendence to delete that debuff and you will use less amount of healing skills when your Force regeneration is lower. If you really have to use Vindicate with Weary debuff, don’t get more than one stack of Weary. 4 stacks are disaster and you can use Healing Trance so often that you don’t really have to get 4 stacks even if you use only Rejuvenate + Healing Trance.
In many situations, you won’t have enough time to use Vindicate three times in a row. Try to use it enough times to save both your Force and your allies.
Force Management in PvP are a little easier then in PvE, because your Force regenerates during stuns. That is next advantage of Amnesty buff.
Good thing in Sages is that you can stay at 10%-20% Force because your Force regeneration isn’t worse when your Force bar is almost empty (Scoundrels and Commandos have to stay at 50-60% energy to have full-regeneration).
Remember that Altruism allows you to use your insta-cast Benevolence for free. Remember about it when you are running out of Force.
Be aware of your Force bar. If you are going to run out of Force, try to find the most optimal moment to use a few Vindicates.
Mental Alacrity & Force Potency
Mental Alacrity allows your to cast your skills faster because you get 20% Alacrity for 10 seconds. I mostly use this skill in two situations:
1) My teammate is going to die. While I have Mental Alacrity, I can use my Healing Trance with only 1,8 second channel and my Wandering Mend cooldown goes down to about 11 seconds. What’s more, you are immune to pushback and your skills cannot be interrupt so you don’t have to worry about casting them too long. Fun fact here is that alacrity is working on this ability’s cooldown. So if you use it, it will restore faster.
I recommend using Deliverance instead of Benevolence (but use insta-cast Benevolence) during Mental Alacrity because it has about 1,5 second cooldown then and you can heal for much better amounts. With Rejuvenate + Deliverance, you cast for huge amount in short time.
Alacrity doesn’t work for most of your defensive abilities, that’s why you mustn’t use Mental Alacrity to restore your Force Barrier or something faster.
2) My teammates need healing and I’m going to run out of Force. I use Mental Alacrity to have time to use some Vindicates during healing. I mostly focus on using Rejuvenate+Healing Trance then Vindicate and I use Wandering Mend to make sure that they’ll survive.
If you have Metaphysical Alacrity Utility, you can use Mental Alacrity for speed boost if you have Net or your opponents are hitting you to much because of Transcendence.
Force Potency allows you to use two skills with 100% critical chance (you always must have 40% in Warzones + 60% from this skill). I mostly use it on Healing Trance when my Rejuvenate is on cooldown to get three stacks of Resplendence.
Force Potency is not working for Salvation. Remember about it to have skill to use when your Healing Trance is on cooldown.
Healing Trance used with Force Potency critically hits with all ticks while Wandering Mend critically hits only with first tick. That’s why I try to never use Force Potency for Rejuvenate and Wandering Mend.
I use this skill mostly for Force Management. If my allies aren’t going to die, I use: Healing Trance -> Vindicate x3 -> Salvation -> Healing Trance. I can restore enough Force to make my healing easier if my ally is in need.
I try to never stack Force Potency with Mental Alacrity. Longer you have any helpful skill longer you can heal effectively and longer you survive.
UI & Positioning
User Interface & Positioning
You should always try to make your User Interface looks easy. When you are preparing your interface for fights, make it in that method that will allow you to get many informations in short moment.
Choosing best options in Preferences:
Controls:
- Enable Focus Target – observing main target helps you decide what to do in chosen situation. If you know that he is dying, you can use different skills. Enable and use it.
- Camera Max Distance: 100% – you don’t have to look from 100%, but always you can get to 100% in the fight to see everything from distance when every target is in another place.
- Quick Ground Target Activation – It allows you to place skill by double-clicking without choosing location manually. It’s must have for every healer and also for another classes in Huttball. This allows you to place Salvation faster. In many situations, it’s better to place it manually to have more targets in range but it’s still worth it.
Sound
- If possible, enable sound in game. It will be easier for you to know when you have skills like Assault Plastique or Demolish on yourself.
User Interface:
- Cooldown Settings: Show Cooldown Text, Show Ready Flash, Show Global Cooldown Ready Flash – This settings allows you to be more aware of skills that you can you. Also my advice is to max Text size and Tenths of seconds.
Nameplates:
- Always Show Resolve Bar – Resolve Bar can be very important while dealing with stuns. Watch at it.
- Nameplates of Self – You are more aware of yourself while fighting.
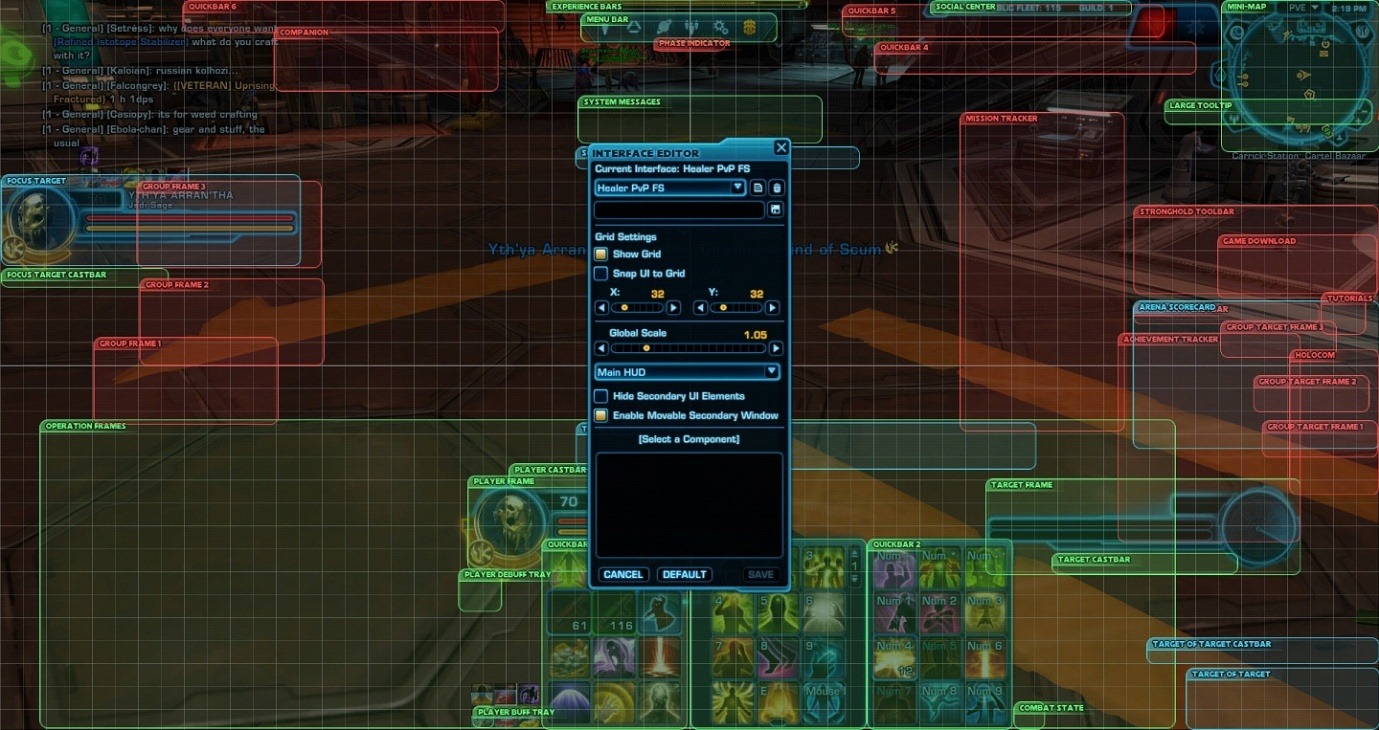
My User Interface Editor:
Choosing best options in Interface Editor:
- First of all, don’t enable 6 quickbars if you don’t really need them. Three of them are enough in my opinion, you can take fourth if you want to have visible mounts etc.
- Disable all things you don’t need like Companion window or Mission tracker.
- Things like Menu and Experience bars can be small during PvP.
- Don’t choose ,”Show Information Text" for Player and Target Frames because it won’t work as good as you think. Text makes red bar less visible and it will take you longer to observe your health.
- For Operation Frame:
- Make it as big as possible
- Enable ,”Show Health Text"
- Enable ,”Show Only Removable Debuffs" – it’s amazing because you see who need cleansing in chosen moment. You won’t waste Cleanse on debuffs you can’t remove.
- Max Health Width and Height
- My advice is to make Quickbars as big as possible. Your eye will more easily choose skills which are not on cooldown.
- Remember to always have ,”Target of Target" enabled. It’s perfect because your teammates won’t always hit focus target because of defensive cooldowns etc. It’s the most vital when your allies decide to play with Hardswitch.
User Interface and your gaming equipment:
In my opinion, your quickbars should match with your gaming mouse and keyboard and with your keybindings. Personally, my first quickbar is for skills, I don’t use so much and I can click them with my mouse, my second quickbar is for skills, I use mostly with my keyboard and my third quickbar is for skills I use with my macro-buttons on my mouse. I made my bars look like my mouse (Logitech G600) so I look at my bar and I can choose very fast where chosen skill is on my mouse.
Using gaming mouse or keyboard in SWTOR, makes gaming experience much easier. You can jump between skills more easily so I recommend it to you. Then matching it with your quickbars makes it even more easy.
Don’t be scared to change your User Interface often. Check every possibility and decide which one suits you the best. You can’t choose best in one week, believe me. The more you know, the more you will be interested in good options of your Interface
Positioning
Good positioning = better view and easier chance to escape.
I would say that Distance is more more important when most of the opposite DPSes are melee because while healing your teammate, it is often very hard to both have him in position to heal and LoS melee. LoS is more important for ranged DPSes because they mostly have safe distance as you so they will have chance to attack you if you are far from them.
There are two different positioning while playing Arenas with tank and without tank. There are also another positionings in Regular 8vs8 warzone when you have to defend or get objective.
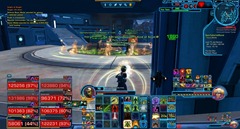
On this screenshots, I stay close to pillar and I have enough distance to heal my teammate. I can hide behind that pillar if enemies are about to attack me. I’m attacking objectives so I don’t have to stay close to them to protect.:
Arenas
Playing with tank
In most situations, you will get Guard at the beginning of the fight. Guard has 15m Range to transfer 50% of damage you take to your tank. It means that you should find best position within 15 meters range but it shouldn’t be also too close to your teamates because it will be much harder for you to heal if everyone in your team gets DoT damage. Read more in ,,Playing with tank" in Survival section.
Playing without tank
Your healing abilities have a 30 meters range. Playing close to your team is very bad because you can be easily stunned. What’s more, distance gives you possibility to use your Rescue with its full power. Try to stay at about 25m Range from your allies to be safe. Even if melee DPS will CC you, he will have to go back to his target and without second jump, he will lose a little time. Stay close to LoS objects to have possibility to hide behind them. Try to choose place to see your allies, you can let them die if you allow them to hide that you must go 20 metres to heal.
Here is an example. My melee is target and opposite melee is target. My ranged teammate isn’t in perfect position because he don’t use LoS against ranged enemies. If my melee dies or they change target to my ranged. I should try to position myself better because I will be too close to melee enemy. but I must be careful not to lose my LoS against ranged.
8vs8 Warzones
Defending objective: Always stay close to it. You must have chance to interrupt your enemies fast because it’s very possible that you will get stun in a moment and lose objective. In 8vs8 Warzones, you don’t have to worry about dying so much. Protecting objectives should always be a priority. You must remember: Even if all your teammates stay close to turret/door/etc, they can be total ignorants and they only fight them because they like to fight.
Attacking objective: Here you are free to stay not so close to your allies, you should play similar to playing in Arenas. In Odessen, you should stay inside base because you are about to take it and it’s possible that your allies will stun enemies outside and you capture base.
Try never stand to close to objective if you have stealths in your team because they can go there and capture when enemies are targeting you.
Huttball: Try to always stay close to someone with ball (but not to close not to get additional AoE damage). Follow ball, you must support your clever allies to win. It’s also very good idea to go upper/further to summon your ally to score line.
Survival
Defensive cooldowns are what makes Sages so powerful. You have a lot of them in your skill set. You must try to use your abilities with lower cooldown first but it’s not always possible.
Sometimes, you need to use Phase Walk and Force Barrier after a very short time because you get too big burst damage at the beginning of the fight.
With Kinetic Collapse Utility your Force Armor is nice defensive skill but you mostly won’t be using it because of this mezz but you want to mitigate damage by Force Armor.
Force Barrier
Force Barrier is your best survival skill and can save you in any way, you want. First of all, it’s stun-break so there is no reason to use Force of Will and then use Force Barrier.
Don’t use Force Barrier to just break stuns. Only exception is when your objective in regular Warzone will be taken if you don’t break stun and if your ally is dying and you are 100% sure that when you help him to survive, you won’t need Force Barrier for its cooldown. In 99,99999% situations I don’t recommend using Force Barrier when you aren’t close to death.
Force Barrier sometimes isn’t used in first click so it’s important not to use it too late. But more important is to not use it too fast. NEVER use Force Barrier when you have more than 40% HP. It’s a total waste of skill. Mostly I don’t recommend using it above 20% but don’t wait to get under 10% because someone can use one skill and kill you.
Force Barrier can be blocked by Electro Net so remember to keep your Force of Will for Nets if opposite team has Commandos or Mercenaries.
You can stay in Force Barrier for 8 seconds but of course you can leave it earlier. Best idea is to wait until you get four stacks of Enduring Bastion but sometimes you are forced to leave it earlier because your allies can die. Never let your allies die because you are using Force Barrier too long. After Force Barrier ends, you cannot be interrupted as long as your Enduring Bastion lasts.
Mostly, I break my Force Barrier with Rejuvenate -> Wandering Mend -> Healing Trance to heal as much as I can during Enduring Bastion. Sometimes there is situation that you will get two stuns during Bastion. If you don’t have Force of Will and Phase Walk, it’s very, very dangerous situation. Try to click on your Healing Trance to heal fast for enough health to survive and then use Wandering Mend.
With Life Ward Utility, Enduring Bastion can heal you for interesting amount, but that’s skill is not worth taking in 5.0.
Phase Walk
Phase Walk is your second powerful survival ability. It has 45/60 seconds cooldown so you can use this ability more often than Force Barrier so it’s better to use it first. Place your Phase Walk behind LoS. It’s not so helpful if enemy can easily jump to you and kill you because your health is too low.
Phase Walk can be blocked by Electro Net so remember to keep your stun-break for Nets if opposite team has Commandos or Mercenaries.
Always remember to place Phase Walk, it won’t work without placing it. Phase Walk has 60m metres range, try to always stay within its range. If you use it out of range, its placement will disappear and you will be left without powerful ability.
If your fight is going to take place too far from your Phase Walk location, delete it by right-clicking it in your buffs and place it one more time. Your Phase Walk’s placement lasts for 10 minutes but mostly you will have to use it or place it in another place much often. When you don’t use your Phase Walk during one Arena round, it will stay in its previous location. You don’t have to place it one more time if fight takes place in similar location.
Best places to leave Phase Walk
8vs8 Warzones:
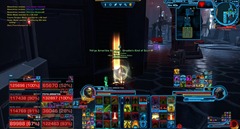
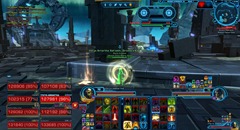
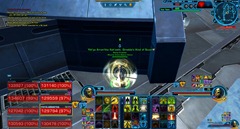
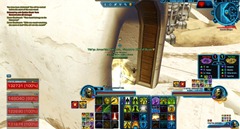
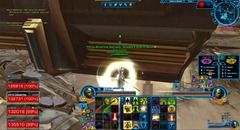
Voidstar (first door):It’s the best position because you are safe and close to Medpac if you need it. In some situations, you don’t have enough time to come here to place Phase Walk, I recommend placing it behind that pillar on right side of screen then.
Ancient Hypergate:
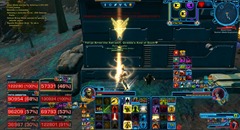
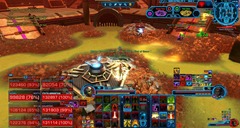
In this situation, we are preventing opposite team from capturing their pylon. I hide my Phase Walk here for good surviving because I won’t hide much but I’ll fight close to pylon to interrupt enemies.
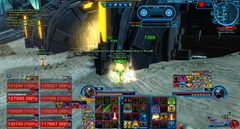
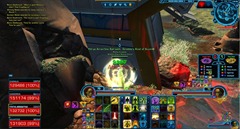
Alderaan (mid fights): If I already used my Phase Walk and I don’t have time to come back here, I can place the next one behind ,”doors" in mid:
In both Odessen Proving Grounds and Huttball, you should place your Phase Walk mostly for doing objectives. For example: I’m protecting base so I must stand inside it, I place Phase Walk inside so I can teleport back when enemy knock me out of it. In Huttball, you should place Phase Walk close to place where ball resets (to take it fast after scoring) or close to enemy’s score line to summon your ally with ball with Rescue.
I place my Phase Walk here close to ball-stand, I can easily come back here when any team scores:
Arenas:
Orbital Station (remember to replace your Phase Walk if you rush enemies): 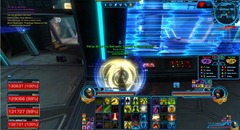
Makeb Mesa:
Tatooine Canyon: (when fight is going to take place on the opposite side, I can hide my Phase Walk behind the most optimal pillar):
Rishi:(the screenshot isn’t best but you can see that it’s under doorstep to wooden floor):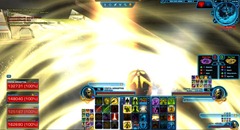
Corellia Square:
While using Phase Walk, your allies are likely to get big damage before you heal to full and come back to them. While healing try to find where they are and get there as fast as possible. Many of your allies won’t have any idea that you had to use Phase Walk so they won’t be interested in won surviving so much. Be mindful when you use Phase Walk and your teammates have no positional awareness.
Good idea is to make a triangle between your Phase Walk’s placement, your teammates and yourself.
Force of Will
Force of Will is your stun-break. Use it wisely. NEVER breaks first stun if your allies isn’t going to die and you are safe without Net.
If there are Mercenaries or Commandos in opposite team, save your stun-break for Net. Mostly you will get Net at very low HP but if you aren’t stunned and you will not die without using Phase Walk or Force Barrier, don’t break Net. Your stun-break is always useful so it’s important to save it for the worst scenario.
You must use stun-break when you will not have enough time to safe objective in 8vs8 Warzones, even if your health is full.
Your Force Barrier is also your stun breaker but it’s powerful because of immunity to damage.
Warzone Adrenal and Medpac
Warzone Medpac and Warzone Adrenals are perfect to save you when you get huge damage and they are often enough to prevent you from using Phase Walk or Force Barrier.
Important: You can use Warzone Medpacs only once per fight. As you are not stealth class, you won’t have chance to exit battle until all of your enemies exit it. That’s why you shouldn’t never use your Medpacs when they aren’t needed. What’s more, Adrenal has very long cooldown so you can’t use it more times than two times during Arena round and about 6 times during very long 8vs8 fight.
Try not to use Medpacs when you have more than 40% health. You won’t die in one hit and you can heal yourself to safe amount and you will lose its full potential.
As for Warzone Adrenal, use it when you think, you will get unhealable damage in next seconds. 15% reduction is perfect for Bolstorms/Blazing Bolts and Demolition Round/Heatseeker Missiles when you have not enough time to LoS.
Sages can use two things as healing defensive cooldown – Force Mend and Warzone Medpac. Force Mend always should be used before using Medpac. Use Medpac when your Force Mend is on cooldown.
Force Speed
Force Speed is your main escaping ability. With 15/20 seconds cooldown, you can use it often to hide behind objects and make bigger distance between you and melee attackers.
With Emersion Utility, Force Speed will be your main root-break, especially useful in fights against Snipers/Gunslinger when you get to close to them or Shadows/Assassin when they have root in Force Wave/Overload.
Don’t be scared to use Force Speed when enemies get to you, because it has short cooldown.
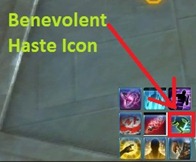
With Benevolent Haste Utility, your Benevolence will give 50% speed boost for 6 seconds. Try not to mix Force Speed with Benevolent Haste. The only exceptions are roots during Benevolent Haste, you want to use Force Speed to delete them.
Electro Nets
Electro Nets are extremely dangerous . In 5.0 there are tons of Commandos and Mercenaries so you will get a lot of Electro Nets in both Ranked and Unranked Warzones. Sometimes in 8vs8 fight I can get 4 Nets in a row! It’s a little too much for one stun-breaker.
Electro Net images:
Blue image is for Commando’s Net and yellow image is for Mercenary’s one.
Electro Net: Level Granted: 51 – Cooldown: 1,5 minute – Range: 30m – Fires an electro net that ensnares that ensnares the target, reducing its movement speed by 50% and dealing X energy damage over 9 seconds. While affected, a target that moves takes 20% more damage from electro net and this effect can stuck up to 10 times on ememy players and 5 times on any other target. Additionally, the electro net hinders the target, preventing the use of high mobility actions and escapes such as charges, vanishes, and speed boosts. Last 9 seconds.
Best idea in 5.0 is not to break first Net if you really don’t have to (for example: your tank uses stun on DPS or second healer in 8vs8 is healing you without problems). First try to heal through Net and hide to not get too much damage. If you must use Phase Walk or Force Barrier, then break Net. One person won’t kill you if you are above 30% of health. That’s why you shouldn’t break your Net if only one person is attacking you.
If good Commando is the only one in opposite team, he will try to Net you when your health is low. Then you care about one Net so you must break it when your health is at about 20-30%. When you have Force Mend available, you can use it and try to heal but you must be very,very careful.
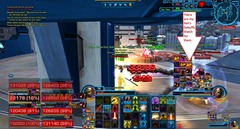
On this screenshot, I don’t have Force Mend, Warzone Medpac, Wandering Mend and I have a little health. I must break my Net to use my Phase Walk or Force Barrier:
If you are playing with tank, best idea is not to move, so you don’t get additional damage from Net. Without tank it’s more useful to move to LoS. You can’t use Force Speed during Net, so if you must change your position and you have Metaphisical Alacrity Utility, I recommend to use Mental Alacrity if you didn’t use it before. 100% additional speed is perfect to deal with Net’s slow and alacrity boost allows you to heal through Net without using your other defensive abilities.
Remember that any other player can get Electro Net. If you can see, how many Nets have been used, you can imagine if you will need your breaker or not. You must remember that Sages DPSes can die very easily while with Net. They will need a lot of healing if they won’t break it. Try to help them with Rescue and LoS. If you heal them enough to prevent them from using Force Barrier and Phase Walk, you will have a huge advantage against opposite team.
Line of Sight
Line of Sight allows you to protect yourself against burst damage, jumps and crowd controls. It’s very important to LoS abilities like Ambush/Aimed Shot, Penetrating Rounds/Penetrating Blasts or Boltstorm/Blazing Bolts. Good healers always use environment to win the battle.
You can LoS behind pillars, boxes and also if you are higher than your enemy and don’t stand close to the edge. Using Force Wave (for example in Orbital Station Arena) allows you to knock DPSes down and you have free time to heal your teammates to full before they come back.
With Force Speed you can run around pillars and another objects (Tatooine Canyon Arena in the middle is perfect for example) to LoS most of casted abilities. Remember: More abilities you won’t get, less healing you must do to survive. If you allow enemies to hit with every skill, you will die super fast because as Sage you will get huge damage.
Playing with Tank
Playing with good tanks makes your life and healing much easier because of Guard. In 5.0 all kinds of Juggernauts/Guardians, Assassins/Shadows and Powertechs/Vanguards can give guard but mostly you will get Guard only from tanks because Vanguards and Guardians can be often killed easier than you.
Guard: Range 0-30m – While active, the guarded player takes 5% less damage and generates 25% less threat. In addition, as long as you remain within 15 metres of the guarded player, 50% of all incoming damage from enemy players is transferred back to you.
Knowledge who is guarded at the moment is very important for healers. You can see huge, blue around guarded player and small, white cage under tank’s feet. You can also see who is guarded by seeing icon in his buff log.
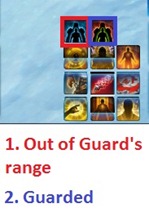
Red icon: Target is guarded, blue icon: target is out of Guard range.
If your teammate is stunned out of guard range and your tank isn’t very interested in it, you can easily summon him back to tank with your Rescue. If you are guarded and you see blue icon, look where is your tank and come back to his location.
You must remember to stay in 15 metres range if you are guarded. 50% damage will be transferred back to your tank and he has good survival ability (if not used) to deal with additional damage. Your mission as healer is to heal both guarded player and his tank to save them both. Without tank, you’re team is much easier to kill so always remember to make sure that your tank will survive.
If your tank is going to die and he has Guard on you, you can use your Warzone Adrenal to not let him die because he gets too much damage from you. Try to use Force Armor on both of you when you both have enough health.
Tanks make the strongest skills like Ambush/Aimed Shot and Heatseeker Missile/Demolition Round less harmful for you. When you both get damage (you from players, tank from Guard), you also both have defensive abilities so you both can survive when you don’t have your strongest heal and damage becomes unhealable. That’s why many of Arena fights with healer and tank ends in Sudden Death.
When you have more than one tank in 8vs8 fights and tank who is guarding you goes to help another objective, you can easily turn off his guard by right-clicking guard icon on buff bar and you will help second tank to give you Guard.
Try to observe your tank’s Defensive Cooldowns. It will be much easier to decide who and how to heal if you know for example that Shadow can use Force Cloak, Vanguard has Adrenaline Rush available or Guardian can heal to safe level with Focused Defense. You should also be aware of damage reduction and similar skills like Guardian Leap. You can heal with weaker skills during them and safe your Wandering Mend for next time if they have enough health. You can also pop you Force Barrier a little later if you get less damage. I recommend to read tanks’ skill trees before going Ranked to make sure that you know what can save you.
Sudden Death
Sudden Death is the moment when time runs out in Arena. You main mission is to get as close to the middle of the map as you can. Sudden Death appears mostly in healer+tank fights.
When green field is about to get to you, try to restore as much of your health as you can and use Force Barrier. Choosing best moment to use your strongest abilities is very important.
Best rotation before sudden death is: Rejuvenate -> Wandering Mend -> Force Mend. You can restore even 70k HP with it and mostly is enough to heal you to full and then use Force Barrier. If you don’t have Force Barrier, best idea is to hide behind an object AFTER green field gets to you.
When green field gets to you, don’t heal because all your heals will restore 0 health. Use only Force Armor on yourself to save you against players and then use your damage abilities to attack enemies (mostly healer when without Barrier). If you kill them before Sudden Death kills you, you win.
Misc Tips
Mobility
Sage’s mobility is incredible. You can cast most of your skills while moving because You have Utility which makes Healing Trance works like this and most of other skills are or can be instant-cast.
Force Speed gives you amazing boost to your speed. You have two seconds to position yourself better or escape from melee.
You can chase around all map, not to let opposite DPSes to get. You must always be mindful if your Phase Walk is in range.
LoS is very important to decide where you should run. Moving between two objects which you can use to hide can save your life. Try not to move always in same method if you are running around the map because enemies can learn your movement and get you easier.
Here is an example of hiding and running. I placed my Phase Walk behind pillar so I don’t want to come back here. I start with running around main pillar but after two circles enemies know my movement so I use Force Speed to go upside . I use Force Wave to knock down some of my enemies and try to LoS rest of them upside . When knocked enemies come back, I go to chosen place and jump down to LoS under the second floor. Enemies jump after me so I find another LoS object and I try to run around him and then I come back to main pillar or I go upside with another stairs. I try to mix my movement because I don’t want to be predictable. Never go to LoS object when you have your Phase Walk because there will be no reason to use it.
Sage vs Other Classes
Sage versus Sage/Sorcerer: You must remember that another Sages can mezz you with Force Lift. Most of healers won’t have instant-Force Lift so you can protect against it but many DPS Sages will use it without cast and it can be dangerous when your ally don’t have safe level of health. When there is Balance Sage/Madness Sorcerer in opposite team, be careful not to have too low health when using Phase Walk. It’s possible that you will die before casting healing skill when you have Vanquish/Demolish on yourself, Vanquish is powerful skill, when you hear the heartbeat sound, you have it from Sage or Shadow. There is good idea to use LoS against DPS Sages because they have long range and in most situations, they won’t stand close to you so you can hide behind nearby objects easily. In 5.0 watch out for Telekinetics burst damage, it can be deadly if you allow Sage to hit you all the time.
Sage versus Shadow/Assassin: Shadows are stealth class and they can easily get to you while stealthed. If you are not target, there is possibility that you will be mezzed from stealth. Don’t break first mezz, if you are not in active fight, there is possible that you will get another mezz and you will be grounded. Best idea to deal with this mezzes is to use one DPS skill (Project for example) as fast as you see any enemy. You will join battle and no Shadow will be able to mezz you from stealth. Same as Sages, Shadows can mezz you with Force Lift. If you are target, you can be stunned from stealth for 2 seconds. With Infiltration in opposite team, you can lose a lot of health very fast so if you are unable to heal through this damage because of stuns, use Phase Walk. Infiltration also has long-distance stun and you will be stunned with to allow Shadow to get to you. When this stun ends with damage, try to hide from Shadow, using Force Speed. There is different situation with Serenity Shadow. They aren’t so strong to kill you fast but their DoTs are painful for whole team. Don’t stand close to them, or you will get DoTs and you will have another person to heal.
Shadow tanks can easily stun you for 2 seconds every 20 seconds. Combined with other mezzes and stuns it can be dangerous. You can knock Shadows back with Force Wave and you can run from them with Force Speed. They can also be stunned when your Force Armor explodes with Utility.
Sage versus Vanguard/Powertech: As for Tactics Vanguards, be careful because they bombs etc can kill you almost instantly if your HP is too low. Watch your debuff bar and be mindful of your health level if you have Assault Plastique/Thermal Detonator there. In Arenas DPS Vanguards are often first targets so you mission is to survive longer than Vanguard. Be careful, every Vanguard has AoE stun. If your whole team is stunned, there won’t be anyone to save you if you are in trouble.
Sage versus Commando/Mercenary: Commandos are your biggest pain. They are very strong, mobile so it’s harder to hide from them than from Gunslingers. They also have the worst skill for you – Electro Nets (read more in ,,Electro Net" in Survival section). Your best chance for dealing with them is Force Speed (without Net) and LoS. Try to stun Commandos with your Force Stun often to have a little time to heal yourself. It’s also useful to use Grenades on them.
Sage versus Sentinel/Marauder: Sentinels are very, very strong but you have easier way with them than with Commandos because you can knock them back and you can run from them with Force Speed. They can also be stunned when your Force Armor explodes with Utility. Combat Sentinels can be very dangerous in this expansion because they got skill which works similar to Electro Net but last shorter. Concentration ones can be also dangerous for you because they can take half of health very fast when you are stunned.
Watchmans are similar to Serenity Shadows, don’t stay close to your team, not to get powerful DoTs. Transcendence is big addition to opposite team, try to stun melee players while in Transcendence state, because they can much easier get to you with additional speed.
Sage versus Guardian/Juggernaut: Guardians are often first targets in Arenas. That’s why, they will be often stunned. Make sure not to stun Guardian which is already stunned. Your best chance to escape Guardian is to run with your Force Speed when he jumps on you. Vigilance Guardian will try to spread his DoTs on all your team, so remember not to stay to close to your team. Focus Guardians can be deadly for you, so always remember to LoS and run not to let them use many of his skills in a row.
Sage versus Scoundrel/Operative: Scoundrels can be real pain because of their stuns and roots. Try to save your Force Speed for roots if there is Scrapper Scoundrel/Concealment Operative in opposite team but it isn’t always possible. Watch for your debuff bar, if you see Blood Boiler/Volatile Substance icon, make sure you have enough health to survive it and you will have at least enough health to survive this skill and one another because you can die before using your defensive cooldown. Be mindful of Operative/Scoundrel’s Flash Bang. 8 second mezz can be very dangerous if your teammate has low health. They can also mezz you from stealth if you are not in active combat. So try to use one damage ability on enemy or heal your ally who engaged in combat to prevent it. If you are mezzed by it, don’t break it if your teammate isn’t going to die.
Sage versus Gunslinger/Sniper: Gunslingers can make your life a real nightmare if you allow them to use their strongest abilities on yourself. You must be always aware of LoS when playing against them. When you are about to get damage from Aimed Shot, you will see red point above your head. You have about 1,5 second to LoS this ability or you will get about 25k hit. If your enemy is DoT specced Gunslinger, remember no to stand in his AoEs. They are slowing you and makes you easier to kill. Good thing in Gunslingers is that they aren’t mobile class. It can make LoS easier than with Commandos.
Additional Info
Playing Ranked:
Playing Ranked requires good knowledge about your healing skills, defensive cooldown. Be sure that you can read all informations from your User interface. Don’t queue Ranked if you aren’t sure that you are experienced enough. How do you check if you have enough experience?
1. You can do at least 8k HPS in regular Warzone fights and you had a few when you had more than 10k HPS.
2. Make sure that you use all of your defensive cooldowns while dying.
3. You have fights when you are the only healer and you can survive two million damage without dying.
4. You learnt another classes’ abilities and don’t stand still when you are about to get damage from Assault Plastique and you have 10% HP.
5. In most of Unranked Arenas, you can do more than 7k HPS and survive at least 2-3 minutes (and whole fight if opposite team has mostly tanks and healers)
6. You stay close to LoS objects, not in the middle of the fights.
7. You don’t waste your skills like Rescue, Mental Alacrity and Force Potency.
8. You have Grenades in your inventory.
9. You have full set bonus.
10. You can run a lot while healing and enemies has a real hell with you.
Personally, doing some 2m flashpoints (it can be OPS or another PvE thing) helped me to better understand Force Management. I recommend it to help with healing and then you can learn defensive cooldowns during PvP.
And I please you sooo much, don’t queue Ranked if you only want to farm CXP and you don’t have any idea what to do here. It’s sad when you lose a fight because your healer did 2k HPS and died without Force Barrier.
Grenades
Using Grenades can save you and your allies because if your team understands the importance of them, they won’t hit stunned enemy without reason.
The best option to use Grenades is to stun whole group of melee attackers. You have 5 seconds to heal your team to safe level. I sometimes use Grenades to stun opposite healer when my Force Lift and Force Stun is on cooldown or I don’t have enough time to cast Force Lift.
Biggest disadvantage of Grenades is their very long cooldown. 3 minutes is a half of Ranked round (if it last to Sudden Death). So I recommend to my stuns:
Force Lift (if you have time to cast it) -> Force Stun -> Grenade
If slows and interrupts are enough, you should always start with Force Slow and Mind Snap because they restore really quick.
Boosts/Medpacs on the 8vs8 maps
In the 8vs8 Warzones, you can find small objects which gives you boost to your stats/speed or restores your health.
There are three kinds of them:
Speed Boost (it increases your speed for 15 seconds). This one is very useful when you are going to help your teammates in defending base or if you are going with Huttball. In Huttball you should also take this when opponents are going with Huttball to prevent them from taking this boost.
Medpacs (they heal for good amount of health). They are super useful for classes which don’t have much off-healing abilities but they can also save your life as healer. First of all, decide if you really need this medpac in chosen situation. If you have 50% of your health and your friend with 10% is going to take medpac, don’t steal it from him. Working together can be the key to win any Warzone. Sometimes you are almost full health but enemy with 10% is trying to get to Medpac. Take it before he takes it and you will help your teammates to kill him.
Adrenals (they give you 15% buff to your damage, healing and damage reduction for 15 seconds). They are perfect is you are running out of defensive cooldowns or when you know that you enemy already used all of them. They are not difficult to recognize because they are the only ones with red image.
Boosts on chosen maps
1. Alderaan Civil War:
- Two Speed Boosts are on the way between Grass and Snow (under mid).
- Two Adrenals are in the places with Grass and Snow where you jump down when you are going to them from mid by stairs. There are also two close to Grass and Snow on the opposite side than respawn point.
- Two Medpacs are where Grass and Snow not far when you are going from your respawn when you look left. There are also two on the opposite side of Snow and Grass (close to wall).
2. Novare Coast:
- There is a Medpac on the hill close to Middle base.There are also two Medpacs close to West and East on the rock.
- There is a Speed boost in the longer way from West to East between two small hills.
3. Voidstar:
- There are Medpacs behind the walls next to doors.
- There is an Adrenal behind fence halfway from both first doors. When you pass first doors there is another Adrenal on platform between bridges.
- There is a Speed Boost on the platform between both bridges from the second doors’ side.
4.Odessen:
- There are Medpacs in the rooms with all bases except Turret. Close to Turret there is a Medpac on a long platform on the right side behind Turret’s place.
- There are Speed Boots between down and left + down and right bases. There is one between down and middle base on the platform above mid. There are two on both sides of Turret under platforms with Odessen’s boost.There are also two on long platforms inside building.
- There are Adrenals in the rooms with all bases except Turret.Close to Turret there is an Adrenal on a long platform on the left side behind Turret’s place.
5.Quesh Huttball:
- There are two Medpac on the first floor (above ball stand and under score line) close to stairs from lowest floor.
- There are two Speed boost close to cages close to ball stand and two close to walls on the ball stand’s floor.
6. The Pit Huttball:
- The are four Medpacs in the corners of the map before the score lines.
- There are two Speed boosts in the middle of the lowest level (before score lines).
7. Ancient Hypercrate:
- There are two Adrenals in the way from pylons to mid (one from first pylon and one from second.
- There are two Speed boosts inside the tunnels around mid.
- There are two Medpacs behind pylon (one behind each pylon).
About the Author
Hello! I’m Andunie Anzu and I’m from Poland. I play on Red Eclipse server with my boyfriend, Aguar’ess but I came here from Tomb of Freedon Nadd and I have played this game since January 2015. There are many people who had played much longer than me but I’m satisfied with my experience and I want to share it with other players. I’m enthusiast of having millions of characters in all games (32 in SWTOR at the moment!) but I mostly play as Andunie Anzu (Kinetic Combat Shadow), Yth’ya Arran’tha (Sage Seer), Indu’acca Qu’etzl (Commando Combat Medic) and Soy’ralli (Sentinel Watchman) but you can also remember me as Sonnei’llon, Miesha Tate, An’dunie, Quaedu’nun or Anzu Gilga’mesh. Sorcerer Corruption and Sage Seer have been my main classes since the beginning of my game. I was happy to get my 1629 Solo rating in Season 7. Same as Dulfy, I’m very proud to be a female gamer.
My Youtube channel: https://www.youtube.com/channel/UCaggIBz0xMuskwfZIZtIyUA (there aren’t so many movies now but I’m preparing new one and I hope to put them all in the second half of February). One day I plan to create my Twitch, too but I don’t have it at the moment.
Big, big, big thanks to:
- Dulfy, for giving me a chance to write this guide and publishing it! I tried to make it the best and I hope that I managed to it :). Thanks for creating so amazing site which I open every day!
- My boyfriend, Aguar’ess, for all support he gave me during my game and writing this guide and hours spent together in Warzones.
Sorry for my language mistakes! I have habits from my own language so they exist :).




![clip_image001[5] clip_image001[5]](https://s3.amazonaws.com/dulfy.net/uploads/2017/01/clip_image0015_thumb.jpg)
![clip_image001[7] clip_image001[7]](https://s3.amazonaws.com/dulfy.net/uploads/2017/01/clip_image0017_thumb.jpg)
![clip_image001[9] clip_image001[9]](https://s3.amazonaws.com/dulfy.net/uploads/2017/01/clip_image0019_thumb.jpg)
![clip_image002[5] clip_image002[5]](https://s3.amazonaws.com/dulfy.net/uploads/2017/01/clip_image0025_thumb.jpg)
![clip_image003[5] clip_image003[5]](https://s3.amazonaws.com/dulfy.net/uploads/2017/01/clip_image0035_thumb.jpg)
![clip_image004[5] clip_image004[5]](https://s3.amazonaws.com/dulfy.net/uploads/2017/01/clip_image0045_thumb.jpg)


![clip_image001[15] clip_image001[15]](https://s3.amazonaws.com/dulfy.net/uploads/2017/01/clip_image00115_thumb.jpg)
![clip_image001[17] clip_image001[17]](https://s3.amazonaws.com/dulfy.net/uploads/2017/01/clip_image00117_thumb.jpg)
![clip_image002[13] clip_image002[13]](https://s3.amazonaws.com/dulfy.net/uploads/2017/01/clip_image00213_thumb.jpg)
![clip_image003[7] clip_image003[7]](https://s3.amazonaws.com/dulfy.net/uploads/2017/01/clip_image0037_thumb1.jpg)

![clip_image001[19] clip_image001[19]](https://s3.amazonaws.com/dulfy.net/uploads/2017/01/clip_image00119_thumb.jpg)
