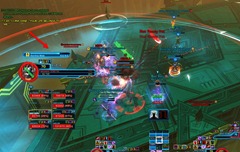
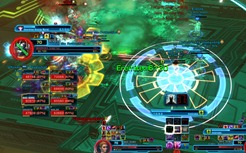
SWTOR Aivela and Esne Operation Boss Guide
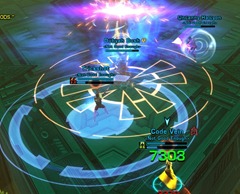
A guide to Aivela and Esne, the second encounter of Gods from the Machine operation.
Contents
Story Mode
HP (8m)
- Codex: 109k
- Nexus: 1.25 mil
- Aivela/Esne: 4.58 mil
Differences from Hardmode
Phase 2
- No tank swap mechanic
- No Countermeasure mechanic (they can be ignored entirely)
Phase 3
- Radiance and Synergy Protocol are there but they can be ignored/overhealed.
Phase 4
- Only two Glare units are active and rotating.
- Nexus Unit won’t drop the Disruptor Pulse item as the bosses do not shield at 7%. They will activate Overdrive Mode however if you kill the Nexus first.
Videos
Healer PoV
Hard Mode
HP (8m)
- Codex: 148k
- Nexus: 1.69 mil
- Aivela/Esne: 6.38 mil
Phase 1 (100-50% Nexus)
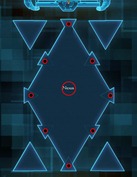
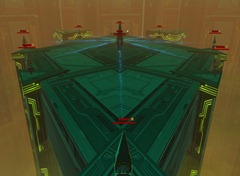
Phase 1 is from the start of the fight until the Nexus is at 50%. You won’t be fighting Aivela and Esne in this phase. It is a more of a preparation phase. The room is shaped like a rhombus, in the middle of the rhombus is the Nexus surrounded by 8 Codex units.
Codex/Polarity Module
Nexus is immune to damage until 8 Codex Units are killed first. These Codex units have no special attacks other than autoattacks called Pulse Fire. These Pulse Fire attacks hits for ~10k each so healers will need to do some healing while DPS nuke them down.
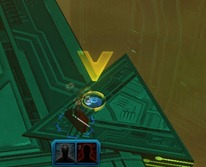
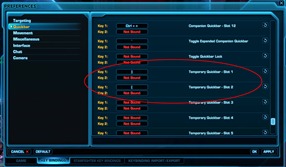
Each Codex unit drops a Polarity Module when killed. When you pick up this polarity module, it give you a new temporary bar with two icons. These two icons are positive and negative polarity labeled as blue and red icons respectively. Everyone need to pick up this polarity module as it is essential for the rest of the fight. You should go to your keybinds and make sure you have bound these two icons to easily accessible hotkeys as you will need to switch polarity really fast (sometimes faster than you can move the mouse cursor to click the buttons).
- There is a 1 second delay after you switched polarities before you can switch it again but otherwise you can swap between the polarities freely.
- Switching polarity does not uses the Global Cooldown (GCD) but it will interrupt any channeled abilities.
Nexus
Once the Codex units are killed and everyone picked up their Polarity Unit, it is time to damage the Nexus to 50% to trigger phase 2. Nexus right now just have the Charge Fire ability, a long damaging beam with a charge up telepgraph. This seems to be randomly aggroed and can target a DPS so if you see it targeting someone else, just move away.
Phase 2 (Aivela/Esne 100%-71%)
Phase 2 begins once the Nexus is damaged to 50%. It will shield itself and becomes invulnerable to spawn Aivela and Esne. At the same time, four Countermeasures will spawn along with four Glare units.
Tank Mechanics
Aivela and Esne both casts an ability called Remote Access. This ability seems to be % based as they can cast it out of sync of each other at times. When this cast goes off, the tank with the aggro will receive a debuff on them with the corresponding color (blue for Aivela, red for Esne). The tank who received this debuff first will need to wait for the other boss to cast Remote Access debuff on the other tank and then do a tank swap (i.e. tank on Aivela going to Esne and vice versa).
Failure to tank swap in time will cause the Aivela and Esne to cast Spike instead of Remote Access and this Spike debuff prevents the tank from changing their polarity. This usually results in a wipe unless there is a DPS with an extra taunt that can take aggro from the tank with the Spike debuff temporarily to allow the Spike debuff to wear off.
- Basically if Aivela or Esne sees that their threat target still have the same Remote Access debuff, they will cast Spike instead of Remote Access.
Countermeasures
The four Countermeasure units will autoattack the highest threat and apply a stacking debuff called Disruptor Pulse. Each stack of this Disruptor Pulse reduces healing done by 1% per stack. This debuff can stack to high stacks very quickly so it is essential that they don’t get on the healers as this healing debuff can make later phases very difficult. The stacks will fall out after 8 seconds unless it get refreshed by the Countermeasures attacking.
Each DPS need to control a Countermeasure by getting aggro on them via attacking them periodically. The Countermeasures wipe their aggro every 8 seconds so the DPS need to switch back to the Countermeasures, whack a couple times and then switch back on to the boss. It is pointless to kill the Countermeasures as they will just respawn immediately. DPS can focus target one of the Countermeasures and watch for a cast called Prioritize as that is the aggro wipe. They can reattack the Countermeasures after to regain aggro.
Tanks can also help with this by using their AoE taunt from time to time next to the Countermeasures.
Glare/Purification Beam
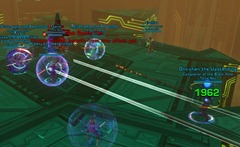
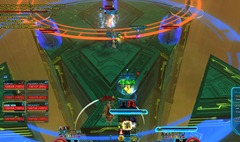
Healers need to position themselves next to the Glare on either end and bait the Purification laser beam. Their Purification laser beam will always target the closest person to them with the opposite polarity. The first purification beam will be random polarity so you just have to toggle a color and hope for the best. The purification laser beam follows you so all you need to do is to run to the side and have the beam shoot away from rest of the raid in the middle. Glare units will change their color to be the same as their beam right before they cast the beam so you have an idea of the next polarity since they alternate between red and blue.
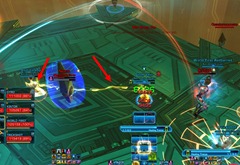
This beam will not hurt you if you have the same polarity/color as it. So once the Glare unit targets you with that beam, swap to the same color as the beam and let it pass through you. Glare units will alternate polarity so you won’t have to swap polarities again until it targets you again. Players without the correct polarity or no polarity will eat massive damage rapidly (~35k damage per tick and two ticks per second) and die rapidly.
The two middle Glares won’t activate this phase so you don’t have to worry about them.
Polarity Mechanics
Aivela and Esne will cast Polarized Energy Burst in between casts of Remote Access. This targets a random player with an circular AoE. This player need to use their polarity modules and swap to the same color to avoid taking damage. You have a few seconds after receiving the AoE circle before the damage drops so there is time to swap and move out of other players.
In the event that you are a target of both Polarized Energy Burst and Purification beam from the Glares, always swap to the same color as the Purification beam as the Polarized Energy Burst won’t kill you but just tickle you with ~10k damage.
Phase 3 (Aivela/Esne 71-42%)
Phase 3 is triggered once both Aivela and Esne reaches 71%. They will both go immune briefly and start casting Radiance. The basic mechanics are similar to Phase 2 but there are a couple of major additions.
Radiance
Both Aivela and Esne will cast a very wide polarized circle around themselves (Blue for Aivela and Red for Esne). Players standing inside these Radiance circles will take ~10k damage every 3 seconds if they don’t have the same color as the Radiance circles. Players need to segregate to the sides and avoid the middle overlap.
Healers doing the Glares at the ends will just need to eat the Radiance damage as if you have the timing off for polarities, the Glares may target someone else in the raid.
Synergy Protocol
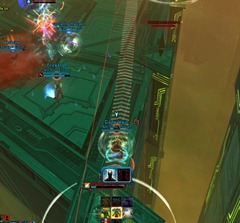
Synergy Protocol is a channeled casted by the Nexus in the middle to both Aivela and Esne. You will need to intercept this cast by having a player standing in between Nexus/Aivela and Nexus/Esne. Failure to stop this cast will cause Aivela and Esne to do double damage to the raid, resulting in a raid wipe with Radiance.
This channel is 24s long and for every second the player standing in between Nexus and the bosses receive a stacking DoT that continuously tick damage. You gain 1 stack of this DoT for every second you intercept this cast. The stacks also falls off with 1 stack removed every 3 seconds. The DPS standing in the middle doing the Synergy Protocol can swap to any polarity as the area they stand in is the overlap of two Radiance circles so they will always take damage from one Radiance.
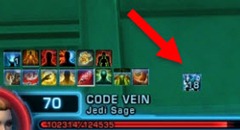
Once your stop getting this stacking DoT, you will receive a second debuff that looks like a Death Mark icon. This second debuff prevents you from intercepting this Synergy Protocol again for 15s until this debuff wears off. If you try to intercept it again with this debuff on, you will die instantly. Tanks and other players need to make sure they don’t run between the Nexus and the intercepting player as this can kill them instantly.
Nexus will channel Synergy Protocol 2-3 times during this phase so you just need to have one set of DPS take care of the first Synergy Protocol and the next set to come in for the second channel. For the third channel, just have the first set of DPS take care of the Synergy Protocol. They will take more stacks but the debuff should be gone so they won’t get killed instantly. DPS will continuously take damage until the stacks are completely removed.
Glare
The two middle Glare units will activate so the set of DPS not doing the Synergy Protocol will need to take care of these two additional Glare units and make sure they don’t beam into the middle of the raid.
Phase 4
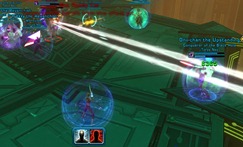
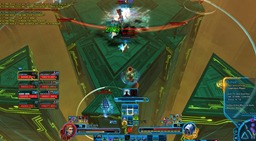
Phase 4 is triggered once both Aivela and Esne reaches 42%. All the mechanics from Phase 2 and Phase 3 except for Synergy Protocol occurs in Phase 4. Additionally, the Purification beam from the Glare units (all 4) start to rotate so you will need to adjust your colors to match the rotating beams as they swing to you. They can rotate clockwise or counterclockwise but there will always be two blue beams and two red beams. Generally the middle is not a safe spot since it is a high traffic area for the beams so you want to stay on your side and avoid the beams.
One thing you need to be super careful about is the width of the beams. The damage area of the beams is larger than the beam graphic. Instead, you need to look for the two thin lines surrounding each beam. Once you cross those thin lines, you are in safe territory.
There is some sort of pattern with respect to how the beams rotate but what I find easier is to switch your polarity matching the closest beams to you and then then run through two beams matching your polarity. Once you have done that, you can just swap to the other polarity and stand still to wait for them to come to you. Sometimes this works but sometimes this doesn’t since an opposite colored beam could be coming for you while you are chasing down the second beam of your color. If this happens you will need to switch your polarity on the fly.
Aivela/Esne and Tanking
Both Aivela and Esne will move in this phase so tanks can just swap taunt instead of swapping places like they did in the previous phases. This makes it easier to avoid the beams as they don’t need to run through the middle.
Overdrive Mode
You want to burn both bosses down to sub 20%ish and push one down ~10% slowly. Once one of the bosses is at 10-12%, have one DPS kill the Nexus while rest of the raid push the 10% boss to 8%. When the Nexus is dead, it will drop an item similar to the polarity module. Have one person pick that item up and it will give you a 3rd ability on your temporarily ability bar called Disruptor Pulse.
Killing the Nexus immediately triggers Overdrive Mode on both bosses. Override Mode is a 8 second channel. At end of the channel both bosses gain 100% more damage, gain 5% HP and start casting Overdrive Energy Burst. This is a special version of the Polarized Energy Burst from earlier except it hits harder and you cannot avoid the damage from it since it is both blue and red circles at the same time. This is basically a soft enrage mechanic.
- During Override Mode there will be no more Remote Access channels as Esne/Aivela just spams Overdrive Energy Burst so tanks don’t need to tank swap.
What you want do here is to push the 8% boss to 7% right away and this triggers the immunity shield on that boss and interrupts the Overdrive Mode channel. Immediately use the new Disruptor Pulse ability on the 7% boss to remove immunity shield and cancel the Override Mode channel. You have a few seconds here to kill that boss.
With one boss down, go back on the other boss and bring it down to 8%. Push it to 7% to trigger the immunity shield and then use the Disruptor Pulse ability (25s cooldown) to remove the shield again and finish the fight.
Doing this last phase you still have to worry about Countermeasures (the other tank can take care of one side after one boss is dead) and the rotating beams from the Glare units. Make sure you get away from other players when you get the Overdrive Energy Burst circles.
Videos
Healer PoV
Melee DPS PoV
Tank PoV


