SWTOR Hardmode Sword Squadron TOS Operation Guide by Zorz
SWTOR Hardmode Sword Squadron Temple of Sacrifice Operation guide written by Zorz.
Contents
Basic Info
Gear Recommendation
- 186 Dread Master gear with some 192 (Resurrected) mixed in is sufficient.
Health
- 3.80 mil (3804838)
Enrage
- 6 minutes
Loot
- 1x Unassembled Revanite Earpiece (198)
- 1x Random Deceiver gear (198, no set bonus)
- 1x Exonium (crafting mat)
- 6 Ultimate Commendations
- 8 Elite Commendations
Basic Overview
Sword Squadron Unit 1 and 2 are the second boss of Temple of Sacrifice. This duo is a step up in difficulty from Malaphar and can be quite movement intensive, especially for the tanks. The difficulty is slightly harder than Bulo, but easier than the later bosses in Ravagers so this is a good boss to work on if you are stuck at Torque or Blaster/Master. Good coordination and a reasonable amount of sustained raid healing is required. The objective here is to attack Unit 1 until it gains Emergency Shielding. Swap to Unit 2 while a bomb runner carries a bomb under Unit 1 and bring its shield down. Focus on Unit 1 until the shield goes up again and repeat until both walkers are low on HP. Bring down the final shield and kill both at around the same time.
Differences from Storymode
The pull in and Gravity Missile mechanic do not exist on storymode. Otherwise, the primary difference is in the health and damage dealt of enemies in the fight. Storymode is a good preparation for Hardmode since the majority of the fight is the same, just tuned more tightly now.
Unit 1 Abilities
| Ability | Damage Type | Damage Source | Damage | Cooldown |
| Basic Attack | Energy | Direct | 1.6k | |
| Rapid Fire | Kinetic | Direct | 2.8k x3 per second for 6s | 25s |
| Mega Blast | Kinetic | Direct | 9-13k (on tank) | 15s |
| Huge Grenade | Energy | Direct | ~7-14k | 30s |
Unit 2 Abilities
| Ability | Damage Type | Damage Source | Damage | Cooldown |
| Missiles | Energy | Direct | 3k x3 all at once | 1.5s |
| Missiles | Energy | AoE | Avoidable | 15s |
| Ground Burst Missile | Kinetic | AoE | ~20-35k (avoidable) | 8s |
| Rain of Missiles | Kinetic | Direct | ~8-10k over 3 seconds | 20s |
Mechanics
Emergency Shielding
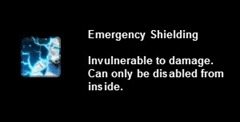
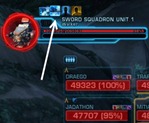
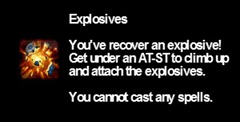
Emergency Shielding is a buff on Sword Squadron Unit 1 that has a cooldown of 60s and will start appear 30s in the fight. The 60s cooldown is static and not affected by when the shield is broken. When this buff goes up, Unit 1 is completely immune to damage. The only way to remove this shield is via the 5 bombs in the back behind Unit 2. The bombs do not respawn when used so you only get 5 bombs to break 5 Emergency Shields.
- You will not get pulled up by Unit 1 unless it has Emergency Shielding.
- Remember that the shield has a cooldown of 60s regardless of when it was broken. The faster you bring the shield down, the more time you have before the next shield goes up.
Rapid Fire/Mega Blast (Unit 1)
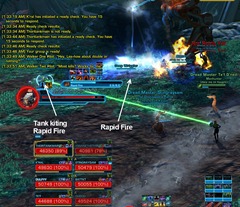
Unit 1 alternates between Rapid Fire and Mega Blast with Basic Attack thrown in between. Rapid Fire is a kitable AoE which can be avoided, but deals a lot of damage over the 6 seconds if stood in. It has a 25 second cooldown. Mega Blast is aimed in the general direction of the tank but cannot be avoided (think of it as a specific AoE frontal). Mega Blast deals a little more damage than Rapid Fire and occurs on a 15 second cooldown.
Missiles (Unit 2)
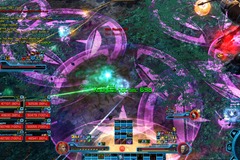
Unit 2 uses an attack called Missiles but is a (non-moving) purple AoE circle that is entirely avoidable. This circle has a 15s cooldown.
Tank Swap
There is a tank swap mechanic that tanks need to pay attention to. Unit 2 will swap aggro onto the tank on Unit 1. To avoid the tank on Unit 1 from taking damage from both walkers, which makes him hard to heal, the tank on Unit 2 should swap to Unit 1 until Unit 2 swaps back to him. At that point, the original tank on Unit 1 taunts back.
Rolling Mines
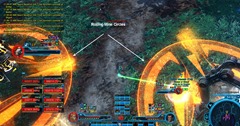
Every 45s, two Rolling Mines will appear under each Unit as orange circles. They will start moving toward a random raid member nearby unless they are taunted by the tanks. Tanks should be able to run into them and absorb the explosion damage. They can also be taunted if one is getting away towards the group. Mainly, these become an issue if they spawn while everyone is getting grappled for Gravity Missiles. The added damage from them on players who are already low on health from Gravity Missiles + Rain of Missiles can be quite deadly.
Targeting Droid
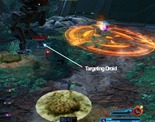
A targeting droid will spawn every 50s starting 30s into the fight under Unit 1. This targeting droid have 60k HP on hardmode and will start casting Laze Target which can cause Unit 1 to target a raid member. We generally just ignore this droid or kill it with AoE since it appears to have no effect that really matters for killing the fight.
Huge Grenade
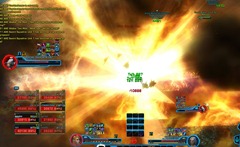
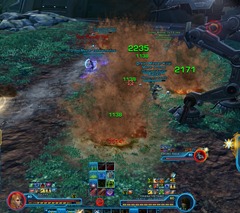
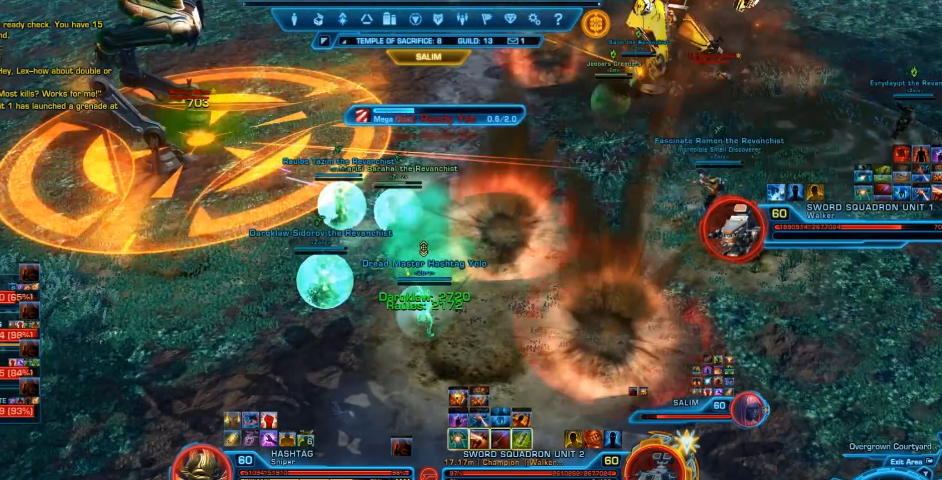
Huge Grenade is a big white circle on a random player (non-tanks) every 30s. The first one will land 20s into the fight. You will see a red text on screen as well. The Huge Grenade deals around 17k damage and also have a knockdown component that lasts a few seconds. You can use your CC breaker to make this knockdown duration shorter. The explosion from the grenade covers your entire screen and can be very dangerous since you are knocked down immediately after. Ground Burst Missile (red circle) have a tendency to land around the same time as the explosion and you are totally blind to them. Move immediately after the knockdown to avoid this. You want to kite this Huge Grenade circle away from the raid or you will cause the damage + knockdown to anyone else inside the circle as well.
- You will not get pulled in by the grapple if you have Huge Grenade on you. However, you will still receive the Gravity Missile debuff so you might need to use some cooldowns if you have both Huge Grenade + Gravity Missile on you.
Ground Burst Missile
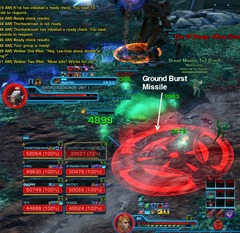
This missile is the most dangerous attack out of the bunch. It lands 3 red circles around 3 random raid members every 8 seconds. You have a few seconds to move out of it or risk taking a massive amount of damage in one hit. While the hit is less than your health pool on any class, you will likely be taking damage from a bunch of other AoEs at the same time and have a high chance of dying.
Rain of Missiles
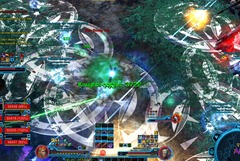
This is a raidwide AoE that occurs every 20 seconds. It deals increased damage if raid members are directly stacked up, so you should be loosely stacked to allow for AoE heals while not taking extra damage. The damage is unavoidable but it is fairly minor. The main issue is that this attack tend to kick up dust, obscuring your view of potential red circles from Ground Burst Missile.
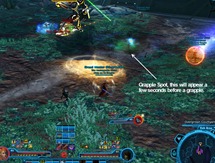
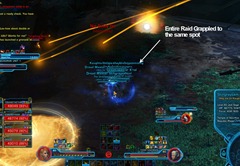
Grapple & Gravity Missile
The grapple occurs every 40s and will pull the entire raid into the area in between the two Units. On 16m this only pulls 8 players. There are two things you raid need to be aware about this mechanic.
- Hold the Line/Hydraulic Override and Hunker Down/Entrench do not work on the grapple.
- There are only two ways to avoid getting grappled: enter cover as a Gunslinger/Sniper, and have a Huge Grenade on you (you will still get Gravity Missile and take extra damage, but you will not be pulled in).
Strategy
Pre-fight
- The first 15-20 seconds of the fight are very low on damage so healers should be DPSing as much as possible in order to shorten the fight.
- Assign a DPS to run bombs from the stockpile by Unit 2 in order to break Unit 1’s shield. However, you should use the tank on Unit 2 to run the very first bomb provided he can build enough aggro to hold passive threat off the healers. This also means DPS can continue burning Unit 1 for another phase rather than having to switch to Unit 2 early.
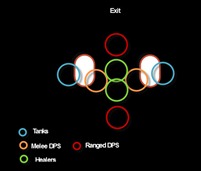
- Assign 1-2 DPS to run in the opposite direction of the rest of the group during Gravity Missile. Ideally these will be melee DPS, with healers staying roughly mid to continue healing the group, and the ranged returning to positions near the wall.
- Assign 2 DPS to kill each walker at the end of the fight, with the bomb carrier assigned to Unit 1 since he will be pulled up with the last bomb.
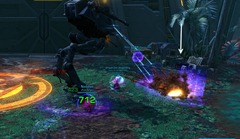
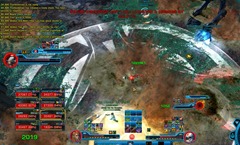
Note that no one should be standing in the middle (between the walkers) when possible in order to keep the center clear of Ground Burst Missile for every Gravity Missile pull in. Even melee can try to play to one side. Also, the Unit 2 tank in this picture is placing the first bomb on Unit 1, but generally he will be near Unit 2 instead.
Main Phase
The fight has several different mechanics all on different timers which varies the pace despite repeating the same exact mechanics for the entire phase with no new phases. Here is the outline of the important raid wide ones all in one place, in case you want to set up timers.
1) Huge Grenade every 30 seconds on a new player (starting 20 seconds into the fight).
2) Rain of Missiles ground AoE every 20 seconds (starting 30 seconds into the fight).
3) Gravity Missile pull in every 40 seconds (starting 40 seconds into the fight).
4) Unit 1 shields every minute (starting 30 seconds into the fight).
5) Ground Burst Missile every 10 seconds (starting 20 seconds into the fight).
6) Rolling Mines every 45 seconds (starting 30 seconds into the fight).
In general, you repeat all mechanics 2-3 times, then most of the raid is pulled in for Gravity Missile and has to spread out. Then all ranged and healers should loosely group back together for AoE heals. Every time Rain of Missile hits the group, spread out slightly to avoid taking excess AoE damage, while watching for Ground Burst Missile reticles on the ground. Then immediately stack for AoE heals.
Gravity Missile can be intimidating but really is just a coordination check. There is luckily plenty of space to spread out. The most important thing is to not stand near the grapple spot in advance of Gravity Missile. Doing so can cause the Ground Burst Missiles to drop on that location and killing the raid when they get grappled to it.
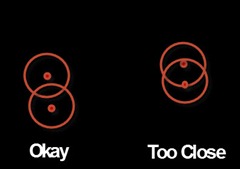
The second thing is to have designated spots for each person so they can run to there and let their Gravity Missile explode without double damaging others. Two Gravity Missile circles can overlap with each other but one person should not be inside two Gravity Missile circles. One method that worked for us was having healers stay in the middle, melee DPS on the sides, and then ranged DPS on the far ends.
The other important mechanic is Emergency Shielding, which is the protection shield applied periodically to Unit 1. Here are the times the Emergency Shielding buff will come up:
- 30s
- 1:30s
- 2:30s
- 3:30s
- 4:30s
- 5:30s
There are two ways to handle this. One is to put all your raid damage on Unit 1 and have the Unit 2 tank. This is the method we recommend. Alternatively, you can have the raid swap to Unit 2 right away at the first shield, and wait for the second shield at 1:30 to run the first bomb (which will destroy all shields), but it’s generally more efficient to burn Unit 1 as much as possible whenever you can. Also, running bombs to Unit 1 automatically does 50k damage to it. Since you only have five bombs, you do not want to run the last one right at 4:30. Instead, continue burning Unit 2 until you are almost ready to kill Unit 2. Then run the final bomb to Unit 1.
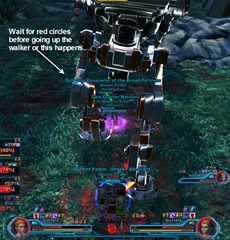
The bomb runner is usually a DPS as having the tank doing it can cause issues if a tank swap occurs (you can’t use any abilities when you have the bomb). DPS should go and grab the bomb about 15s before the shield goes up. If you are skipping the 30s shield, this means grabbing the bomb at 1:15s into the fight. Once you have the bomb, wait for the Ground Burst Missiles (red circles) to appear before running under Unit 1 and get pulled up. If you do not wait for the red circles, you risk having them land under you when you go up and they will most likely kill you since you are stuck under the walker. The bomb lasts for 25s and there is a visible debuff on your debuff bar.
Every minute, just before Unit 1 shields, your DPS assigned to run bombs should go grab one, then take it to Unit 1 and stand under it. The bomb carrier does 50k damage to Unit 1 and Unit 1’s shield breaks, which is identical to Storymode. Ideally he should grab one right after a Ground Burst Missile so that he does not get hit while trying to grab a bomb. In Hardmode there is not a particular need to get the exact timing perfect, but the lower the DPS of your raid group, the better timing you will need to have. Unit 1 will reshield every minute regardless of when the bomb is placed by the bomb runner to break the shield. So you will not get the full minute to DPS Unit 1 if the bomb carrier is late! If you have to wait on your bomb carrier, all DPS can swap to Unit 2 for awhile.
Once Unit 1 is reduced to around 5 percent, save your last bomb and put all DPS on Unit 2 for a few cycles. Once Unit 2 is below 5 percent as well, go run the final bomb to Unit 1. If needed, briefly stop all DPS so that you do not accidentally kill Unit 2 first. Then have each of your assigned pairs of DPS kill walker at the same time, taking care to kill Unit 1 first since Unit 1 will Mega Blast the entire raid when Unit 2 dies.
Tanks: One tank must be on each walker. Unit 1 can be taunted, but periodically shields itself and becomes immune to damage. This also makes it hard to maintain some defensive buffs during this time. Unit 2 cannot be taunted so the tank must hold highest threat at all times without any use of taunts. Throughout the fight, Unit 2 will periodically switch onto the Unit 1 tank, forcing the Unit 2 tank to swap and take Unit 1 for a short amount of time until Unit 2 swaps back to the original tank. You can either physically swap position or simply swap with a taunt while remaining on your original side. Here is the order of events:
1) Unit 2 tank loses aggro to Unit 1 tank.
2) Unit 2 tank taunts Unit 1.
3) Unit 1 tank taunts Unit 1 back when Unit 2 switches back to the Unit 2 tank.
For convenience we do not have our tanks physically swap, but only have the Unit 2 tank taunt Unit 1 when Unit 2 swaps. As long as no one is staying in the very middle (and they should not be, because you do not want to place Ground Burst Missile red circles where people can potentially get pulled in), then there should be no risk of hitting the raid with Mega Blast. There is the chance that Mega Blast could hit the raid during a Gravity Missile, but this is a risk you will have to weigh with the convenience of the strategy. Generally we have not had many problems with our approach.
Otherwise both tanks will generally be occupied with kiting attacks from each walker while watching for red circles. Tanks are also pulled in for every Gravity Missile (but do not generally receive Huge Grenades) so you should quickly exit the group and return to your original position.
DPS: DPS should always be on Unit 1 or Unit 2. If you are not well geared you will need to work fast since the fight has an enrage of 6 minutes. We have tanks try to run into the majority of the Rolling Mines and we do not kill Targeting Droids, so you do not have to worry about those. Your biggest priority should be avoiding taking unnecessary damage (this means always move out of Ground Burst Missile reticles right away!), followed by doing your maximum DPS rotation on one of the two walkers, depending if Unit 1 is unshielded.
If you keep a timer open (e.g. Parsec or Starparse), then you can know very precisely when Unit 1 will shield. Especially if you are a DoT spec, you can start your rotation on Unit 2 just before Unit 1 shields, so that you do not waste time. For example, suppose you are playing a Dirty Fighting Gunslinger/Virulence Sniper with Vital Shot/Corrosive Dart and Shrap Bomb/Corrosive Grenade. If your DoTs are about to expire but it’s only 5 seconds before Unit 1 shields, then reapplying them is a waste, since the ticks will be useless and you will not be able to use Wounding Shots/Cull. Instead, swap to Unit 2 and do a rotation or two until the bomb carrier has broken the shield on Unit 1.
If you are the bomb carrier, you can still do a lot of DPS but you should be aware of the timing so that you can get good burns on Unit 1 and not waste your bombs. The fewer bombs you need to reduce Unit 1 to low health, the better, since that means you are spending less time running around, and the raid has to swap DPS less often. Keeping a timer open is highly recommended since you will be able to stay and DPS for as long as possible. Also, if you are a ranged class, you can do DPS to Unit 2 as you run over to the bomb cache, although Vanguard/Powertech and Shadow/Assassin are the fastest bomb carriers. Remember to pop a speed boost (Transcendence/Predation, Hold the Line/Hydraulic Overrides) if possible just before you click to grab a bomb.
Heals: This fight can be very intimidating to heal at first since the raid can potentially take large amounts of damage. Two things that are not really under your direct control that you should not be blamed for:
1) The raid taking Mega Blast damage from Unit 1’s cleave.
2) People dying to damage from Ground Burst Missile.
3) People dying to overlapping Gravity Missiles and taking double damage.
Other than these factors, everything should be manageable. If your group follows our rough raid positioning, you have plenty of chance to AoE heal the raid after Gravity Missile and from Rain of Missiles. If you have a heavily melee group, try to use an AoE heal or two on the melee whenever the tank on their side is near them, in order to be more efficient. If you are struggling to keep tanks alive because they can be hard to keep in range, either advise them to kite a bit closer and/or assign a healer to keep up each tank, with both healers helping with the raid.
Every time you see the Gravity Missile pull in animation in the center, you should be ready with your best AoE heals since this is the only chance you have to AoE heal almost the entire raid group. This will be especially helpful if people are somewhat low on health going into Gravity Missile. Each class has unique skills they can use:
1) Scoundrels/Operatives can use Kolto Cloud/Recuperative Nanotech, although this only hits up to 4 targets, it’s still a good time to use it for full effect.
2) Sages/Sorcerers can precast Revivification in the center where everyone gets pulled in, as well as use the knockback heal once pulled in, if specced into it. These healers can also time an instant Wandering Mend/Roaming Mend just as the Gravity Missiles detonate to prevent very low health people from dying.
3) Commando/Mercenary can use Kolto Bomb/Kolto Missile (you can even throw it just as you get pulled aiming at the location everyone will land in order to save a GCD). These healers can also use their knockback heal immediately followed by Successive Treatment/Progressive Scan to target the lowest health raid members nearby.
Remember though, your highest priority is identifying low health raid members and ensuring they do not die from their Gravity Missile explosion, which means that everyone needs to be above about 15k hp when Gravity Missiles explode.
Class-Specific Tips
Guardian/Juggernaut
- Be careful if you are a tank and opening with Saber Reflect on Walker 1 since it is possible to actually pull off the tank trying to aggro Walker 2 at the same time.
- Saber Ward and Enure/Endure Pain are most useful for Huge Grenade and Gravity Missile.
Sentinel/Marauder
- Force Camouflage, Saber Ward, and Guarded by the Force/Undying Rage are all excellent at mitigating various sources of damage. For example, you might Force Camouflage your Gravity Missile, then receive a Huge Grenade and pop Saber Ward.
- The extra speed on Transcendence/Predation is excellent for the bomb runner (even if you yourself are not running the bomb). It can also be helpful after a pull in for Gravity Missile, as well as enable the tank to kite more easily, but this is not really necessary.
Sage/Sorcerer
- If you are a DPS Sage/Sorcerer, and you have no Sage/Sorcerer healer, you should occasionally use your Force Armor/Static Barrier to protect tanks when they are very low on health, as well as any raid members taking Huge Grenade or at risk of dying to Gravity Missile explosions.
- The Masterful utility that grants 25% damage reduction from Cloud Mind is highly recommended.
- Force Emersion (knockback heal) is very good for every single pull-in, even for DPS Sages/Sorcerers. This is an easy way to put out some quick raid healing no matter your Discipline.
- Be especially careful with Ground Burst Missile (small red circles) on this fight since you will likely die instantly to them if not fully topped off. Other raid members may more easily survive if they accidentally step in one, so this is a disadvantage to playing Sage/Sorcerer.
- Force Barrier is very good for the Huge Grenade for the following reason. Not only does it mitigate the actual hit from the Huge Grenade, but it is sometimes good to stay an extra second or two in it if you see Ground Burst Missile AoEs on the ground, so that you don’t accidentally die if you don’t see one under your feet as Huge Grenade explodes.
- If you are not running bombs, you can stand by Unit 1 to pull the bomb carrier once they get in 30m range. This speeds up the overall DPS even though it costs you a GCD. It saves the bomb carrier several GCDs and provides more uptime on Unit 1.
Shadow/Assassin
- Force Shroud/Resilience is effective for mitigating damage from almost everything in this fight, such as the Huge Grenade and Ground Burst Missile. One particularly interesting use is for Shadow/Assassin tanks. You take no damage from the Rapid Fire or the AoE circles that you normally kite around while Force Shroud/Resilience is active. This can be a convenience or a help to your healers.
- Place Phase Walk by Unit 1 and Force Speed over to grab a bomb. Alternatively, a Sage/Sorcerer can pull you over to the bomb stockpile if they are DPSing from that corner. Then Phase Walk back to Unit 1 and instantly plant the bomb. Because of this ability, you will lose very little DPS uptime, and Shadows/Assassin make the very best bomb carriers.
- Also, note that while the healing utility for your Phase Walk can be useful, it’s often more trouble than it’s worth because it can obscure view of the Ground Burst Missile.
Gunslinger/Sniper
- Hightail It/Covered Escape can be used to roll to the bomb cache if running bombs, and otherwise to roll Gravity Missile and Huge Grenade.
- Alternatively, Hunker Down/Entrench and Shield Probe to take reduced AoE damage. Hunker Down/Entrench can also be used to sit in Ground Burst Missile while channeling casts.
Scoundrel/Operative
- For Scrapper/Concealment discipline, Scamper/Exfiltrate will evade all incoming damage for 1.5 seconds and can be used to avoid all damage from almost any attack. However, be careful which way you roll so that you do not harm other players and also so that you stay within melee range of your target since hitboxes are very small.
- The most useful upgrades are those to Defense Screen/Shield Probe since you take frequent small amounts of damage throughout the fight.
Vanguard/Powertech
- Use Hold the Line/Hydraulic Overrides right before picking up a bomb in order to benefit from the speed boost while silenced. Combined with the utility that provides a speed boost, this makes you one of the most efficient bomb carriers.
- If not the bomb carrier, Hold the Line/Hydraulic Overrides is best used to reposition out of Gravity Missile after the pull in, or alternatively with the Huge Grenade.
- Use Reactive Shield/Energy Shield either with Huge Grenade or if very low on health as Gravity Missiles explode. Kolto Overload/Adrenaline Rush are best reserved for right after Gravity Missile explosion in case you do not receive heals right away.
Commando/Mercenary
- If not the bomb carrier, Hold the Line/Hydraulic Overrides is best used to reposition out of Gravity Missile after the pull in, or alternatively with the Huge Grenade.
- Use Reactive Shield/Energy Shield either with Huge Grenade or if very low on health as Gravity Missiles explode. Kolto Overload/Adrenaline Rush are best reserved for right after Gravity Missile explosion in case you do not receive heals right away.
- Chaff Flare can be used if somewhat low on health right before Gravity Missile or Huge Grenade hit to try to resist hits (Assault Specialist/Innovative Ordnance).
Group parse of first kill
Advanced Strategy/Video Discussion
Tanking Overview:
In this video, one of our main tanks (Smugglin) outlines the Sword Squadron HM fight from a tanking perspective.
Heals Overview: In this video, one of our healers (Raulos) outlines the Sword Squadron HM fight from a healing perspective.
Full Video PoVs
Tank PoV (Shieldtech Powertech):
DPS PoV (Virulence Sniper):
Healer PoV (Bodyguard Mercenary):
16m Healer PoV (Corruption Sorcerer):


