


SWTOR Hardmode Revanite Commanders TOS Operation Guide by Zorz
SWTOR Hardmode Revanite Commanders Temple of Sacrifice Operation guide written by Zorz
Contents
Basic Info
Gear Recommendation
- Full 192 Resurrected gear should be sufficient.
Health
| Deron Cadoruso | 1373525 (1.37 mil) | Outlaw Revanite | 81622 |
| Lord Kurse | 1373525 (1.37 mil) | Mandolorian Revanite | 81662 |
| Sano Thrica | 1373525 (1.37 mil) | Sith Revanite | 81662 |
Enrage
- Upwards of 7 minutes, 30 seconds
Loot
- 1x Unassembled Revanite Greaves (198)
- 1x Random Deceiver gear (198, no set bonus)
- 1x Exonium (crafting mat)
- 6 Ultimate Commendations
- 8 Elite Commendations
Basic Overview
In the Revanite Commanders fight, you take turns fighting each of the Revanite Commanders for two rounds each while some of their adds are spawned at random. Then all three Revanite Commanders come out at once and must be killed before too many adds can overwhelm the raid. On Hardmode, Revanite Commanders is a fairly serious fight on par or exceeding the difficulty of Bulo and Sword Squadron. This fight is actually fairly easy up until the burn phase, at which point you must exercise a fair amount of DPS to kill the bosses while controlling several waves of adds that can deal a large amount of damage.
Differences from Storymode
The fight mechanics are almost exactly the same as Storymode, but significantly more DPS is required to ensure that the bosses don’t enrage while you kill them in burn phase, as well as to ensure that you can kill them off fast enough in the burn phase. Generally we think that in 192 gear or above this should not be a problem for an experienced group. Every mechanic hits quite a bit harder in Hardmode, but a significant amount of damage is avoidable if adds are killed or controlled and everyone moves out of AoE reticles.
Boss Abilities (Deron Cadoruso) “Merc Boss”
| Ability | Damage Type | Damage Source | Damage |
| Tracer Missile | Kinetic | Direct | ~3.5k |
| Guided Missile Volley | Internal | Raidwide | ~3k per stack of Heat Signature |
| Jet Boost | Elemental | AoE | ~2k |
Boss Abilities (Sano Thrica) “Shield Boss”
| Ability | Damage Type | Damage Source | Damage |
| Ranged Attack | Energy | Direct | ~2.5k |
| Scattergun | Energy | Frontal | ~3k x2 |
| Disrespectful Kick | Internal | Direct | ~4-5k |
Boss Abilities (Lord Kurse) “Marauder Boss”
| Ability | Damage Type | Damage Source | Damage |
| Soaring Smash | Kinetic | AoE Circle | ~10-15k |
| Melee Attack | Energy | Direct | 3-4k |
| Greater Traumatic Slash | Internal | Direct | 7-10k |
Add Abilities (Outlaw Revanite)
| Ability | Damage Type | Damage Source | Damage |
| Saturation Fire | Kinetic | Frontal AoE | ~10-12k dmg per second (stacking per tick) |
| Three Round Burst | Kinetic | Direct | ~2.5k x3 |
Add Abilities (Mandalorian Revanite)
| Ability | Damage Type | Damage Source | Damage |
| Death from Above | Kinetic | AoE Circle | ~4-6k x2 per second |
| Dual Shot | Energy | Direct | ~1k x2 |
| Full Auto | Energy | Direct | ~3-5k |
Add Abilities (Sith Revanite)
| Ability | Damage Type | Damage Source | Damage |
| Force Leap | Energy | Direct | ~12-15k |
| Traumatic Slash | Internal | Direct | ~6-10k |
| Melee Attack | Energy | Direct | 1.3-1.7k |
Mechanics
Outlaw Revanite
Fairly dangerous add that should be prioritized first. The Saturation Fire frontal that they cast is much more punishing than Storymode and deals upwards of 10k damage per tick with infinite range. Stay out of their telegraph. When they are not casting Saturation Fire, they are spamming Three Round Burst which hits for about 3-4k dmg per hit. Also, on Hardmode, these adds will cast Cryo Grenade which applies a hard stun to a random raid member for 4s, which can stun them in dangerous AoEs. This attack can be interrupted so be aware when this is being cast.

These adds have a buff called Tenacious Saturation which prevents their Saturation Fire from being interrupted but you can grapple or crowd control them instead.
Mandalorian Revanite
Mandalorian Revanites have Taunt Immunity and Stabilized Jetpack, which prevents their Death from Above from being interrupted. However, like the Outlaw Revanites, you can use crowd control abilities to stop their Death from Above. Death from Above hits for much more than Storymode and when combined with Saturation Fire can quickly demolish your HP if you are clipped by them.

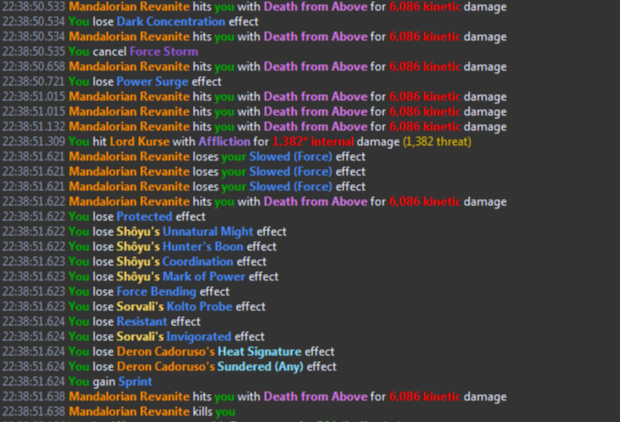
Also if there are several Mandalorian Revanites, you should beware of all of them using Death from Above on the same location since the damage stacks per Death from Above. For example:
Sith Revanite
These adds are a bit tougher to kil with their Defensive Roll buff, which reduces their AoE damage intake by 30%. They do a very damaging Force Leap and some melee attacks but they are not as dangerous as the other two since they do not have any damaging AoE to watch for. However, these are still much worse than on Storymode where they don’t matter at all. They also apply an orange-colored debuff called Trauma which stacks, reducing healing received by 10% per stack.
Deron Cadoruso
His primary abilities are Tracer Missile and Guided Missile Volley. He will spam cast his Tracer Missile on everyone in the raid which also sunders you and reduce your armor rating. This leaves a Heat Signature debuff for each Tracer Missile that hits you. After about 10 or so Tracer Missiles, he will cast Guided Missile Volley which deals damage depending on how many stacks of Heat Signature debuff from Tracer Missiles you have.
Tanks can taunt Deron and receive all the Tracer Missiles on themselves. This will of course increase the amount of damage they take from Guided Missile Volley but reduce the amount of raid damage.


Sano Thrica
Sano Thrica’s main ability is his Energy Reflection Field. This shield will reflect 25% of your damage back to you if you are not inside the shield when you attack him. This is something to be aware so you do not kill yourself with your own damage. Other than that his main abilities are frontal Scattergun and Disrespectful Kick. He should be turned away to prevent him from cleaving the raid.

Lord Kurse
Like the Sith Revanite adds, he also have the Defensive Roll buff that decrease the damage he take from AoE attacks by 30%. His main ability is Soaring Smash, a purple circle that follows the target around and explode after a few seconds for ~12k damage to anyone caught in it. Kite the circle away from the raid if you do get the circle. Seems to be casted on those within melee range.

Strategy
Pre-fight
- Assign one tank to be primary on bosses and the other to be primary on adds. The add tank will have to taunt bosses in a few cases but is mostly responsible for controlling and damaging adds while the DPS are focused on damaging the bosses while they are down and vulnerable.
- Assign 1-2 people to clean up adds during the last burn on the bosses. Leaving adds alive going into burn phase can be devastating since all three bosses will attack and more adds will spawn as well.
Main Phase
After an initial wave of adds, each boss will come out twice during the main phase. During the first burn, you take each boss from around 100% to 65%. During the second burn, you take each boss from 65% to around 30%. Each boss is only down for 25-30 seconds so DPS should be focused reducing the health of the bosses while they can, otherwise they will be very hard to kill in the burn phase. Adds are only a priority when bosses are not down. The second tank and healers can control the adds with CCs while the DPS are busy with the bosses. The best CC’s are the AoE mezzes (e.g. – Carbonize, Intimidating Roar, Flash Bang for Operatives), in addition to interrupts on Outlaw Revanites who cast Cryo Grenade to stun raid members.
In general, using utility load outs that offer more CC duration and decreased interrupt cooldowns are extremely helpful for this fight so carefully consider your options. See the class-specific tips for a non-exhaustive list of some useful utilities. PvP stun grenades (seismic grenades) are very helpful for the final burn and well worth the investment for your raid group. As the DPS of your raid group increases and you become more experienced with the fight, simple CC and AoE will be enough to control the adds.
We highly recommend Vanguards/Powertechs take the reduced cooldown on Grapple, which allows both tank and DPS to repeatedly pull adds together for easier AoE and thus a faster burn. Note all melee classes have excellent AoE mez for adds, while ranged usually provide the strong AoE damage, so we tend to find group compositions are fairly balanced on this fight unless running entirely melee, which does make it slightly more difficult in some phases.
Use class buffs when the first boss comes down and then again as soon as the class buffs are up, which will usually be around the start of the burn phase unless your DPS is very fast. In that case, you might consider not using class buffs at the start.
Tanks: As noted in the pre-fight section, we recommend one tank primarily handle bosses while the other tank works on the adds. The only exception is that you will need to tank swap whenever Sano is out. Here are the important details by boss.
Tanking of Sano – One tank should pick him up and drag him to the Deron spawn location. You take him here because when Sano is out, Outlaw Revanite do not spawn and Sith Revanite will leap to you and Mandalorian Revanite spawn here. This allows you to group up everything very efficiently. A tank swap is necessary on Disrespectful kick. See below for an example of how you can group everything up with this positioning:

Tanking of Deron – If you are running a Assassin or Juggernaut you can tank him and tank zero damage from Guided Missile Volley by using Shroud or Saber Reflect. Since he picks his own location, the off tank should do his best to gather up the Sith Revanites and Outlaw Revanites at one location to be AoE’d after Deron jumps back up.
Tanking of Kurse – We have one tank pick him up and tank him full time. You can tank swap after Soaring Smash, although there is no need to do so. Kurse should be brought and tanked nearby the Deron spawn location for easier access to the Outlaw Revanite whenever you need to interrupt or CC their abilities.
DPS: Your primary job is to push each boss and then AoE down adds. While tanks and healers will have primary CC and interrupts on adds while you are on the boss, you should be ready in case a particularly difficult wave of adds spawn. Also, you should be watching which adds spawn where while you kill each boss, and avoid tunnel vision on the boss. If there are several Outlaw Revanites, for example, you know that Saturation Fire may be cast and you should be already ready to move out of the cleave. You also know these adds cast a stun which you can tab to and interrupt between GCDs, if needed. Or, if Mandalorian Revanites come out, you should know to avoid stacking up with others as much as possible since those adds use Death from Above.
Heals: Any time you notice the orange Trauma debuff on someone, don’t worry about immediately cleansing them since 1 stack is not a big deal. But at 2-3 stacks you should cleanse immediately. Otherwise, the main phase is not that difficult to heal unless people ignore the adds entirely. The difficulty of the fight is largely in control of the tanks, especially the one who is primarily responsible for grouping up and CCing adds while DPS are on the main bosses. With your spare time you should definitely be helping with DPS. For example, throw your DoTs on the main bosses and your AoE moves on the adds. You should also help CC and interrupt adds alongside the tanks while the DPS focus on bosses.
Burn Phase
Once each boss has come down twice, all of the bosses will come down together for a final burn. During this burn you must manage to kill all three bosses. Also, all types of adds will be summoned periodically throughout the burn and these must either be killed or controlled. Our strategy revolves around getting rid of Deron as quickly as possible since he puts stacks of Tracer Missile on the raid and can make healing very difficult when left alone for too long.
So we push the bosses in the order of Deron, then Sano, and then Kurse. We generally find that if we have a good AoE composition or a strong ranged DPS or two, it is not too difficult to get rid of most of the adds as soon as Sano is down. Otherwise, it is possible to keep using various CC, as well as PvP stun grenades, to control adds until Sano is killed. Once Sano is killed, everyone can burn Kurse, while the tanks swap off AoE taunts on the mass of remaining adds. This strategy may be especially necessary if you are close to the enrage and cannot afford to spend much time killing off adds.
If you have difficulty doing it this way, feel free to change the kill order since it does not really matter what order you do, as long as it is easy on the raid. One other common strategy is to kill Sano in the middle first to free up a tank to taunt Deron and prevent the hassle of tank swaps and dealing with the reflective shield. You can then proceed to kill Deron, then Kurse.
Tanks: Essentially you will spend most of your efforts controlling either Sano or Kurse, and then helping with adds. Everytime Sano uses his Disrespectful kick, you need to tank swap. Be careful of Kurse’s Soaring Smash during tank swaps.
Ideally the main tank (call him tank #1) who has been working on bosses should have prior aggro on both Sano and Kurse going into this phase. As the phase starts, Sano should Disrespectful Kick tank #1 as soon as he gets to him. The primary add tank (tank #2) should be ready and waiting to taunt in tank position #2. While tank #2 is awaiting the kick/arrival of Sano he can attempt to grab aggro on adds nearby and tank them. We use these tank positions since Deron. If DPS is slow on Deron, you will need to move Sano away from tank position #2 since Deron will teleport there as his third position during the burn phase.

Tanks will swap on the next Disrespectful Kick and tank #1 will end up with Sano, and tank #2 with Kurse. Dependent on DPS, this will be the last swap and the tank with Sano should move to the very middle and start the CC chain on the remaining adds. Prioritize hard cc/mez abilities before using PvP grenades. Once Deron has been killed, tanks will still be swapping on Disrespectful Kick just now keeping Sano centered in the middle. As Sano is dying, one tank can generally AoE taunt everything and kite to buy additional time to kill Kurse and get everything besides Kurse off healers and or DPS.
Whichever boss you are on, you need to keep them away from the Outlaw Revanites so that their healing puddles do not heal the bosses and lengthen the phase. Once the boss is aggroed on you, you can either just deal damage to that boss or spend your GCDs working on controlling adds. You will probably want to spend most of your effort repositioning and controlling these adds to the greatest extent possible to buy your DPS and healers time. However, they should also be responsible for CC, interrupts, and repositioning.
Your main goal holding Sano should be to keep him away from the corners that Deron is at, since this will slow down damage and inevitably cause some reflect damage.
DPS: You should be focused on killing Deron, then Sano, and finally Kurse. If the raid has at least 2 classes that have good AoE, it is worth taking the time to AoE everything down as soon as Deron is dead and Sano is centered. Almost all of the adds can be brought under Sano’s shield for this purpose.
If you have a cleanse, you should be prepared to off cleanse raid members when called upon by the healers. If you notice someone with multiple stacks of the orange Trauma debuff who has not be cleansed for a GCD or two, you should go ahead and do so.
You should also be actively involved with using your CC’s to help control adds while you kill the bosses. It only takes a GCD or two to do this so watch what adds are coming out and where they are at all times. In particular, you should be very ready to move in case a Mandalorian Revanite uses Death from Above or an Outlaw Revanite casts Suppressive fire.
Heals: This is the only difficult phase of the fight to heal since all three bosses are using everything they have, in addition to several waves of adds. In this phase, there are lots of adds so there is a good chance that Sith Revanites are applying Trauma to several raid members. Since cleanses are on a longer cooldown in 3.0, it is important to cleanse wisely. Never cleanse people at 1 stack and coordinate your cleanses with the other healer if possible. DPS can also off cleanse if someone receives several stacks and both healers have their cleanse on cooldown.
You want to be aware that Deron and the adds will cause raid AoE damage while the two tanks are busy with Kurse and Sano. So you should frequently alternate between doing AoE healing and focus healing each tank. Don’t be too fixated on remaining in the very center of the room next to everyone else since sometimes it can be dangerous for the raid to stack too much. This makes you more vulnerable to the Mandalorian and Outlaw Revanites since they use AoE attacks.
Class-Specific Tips
Guardian/Juggernaut
- When Deron is down, he can be taunted and Saber Reflected while he casts Tracer Missile repeatedly. This will deal a very large amount of extra damage to the boss.
- Save your big cooldowns such as Saber Ward and Focused Defense/Enraged Defense for the burn phase.
- You definitely want to take increased Cyclone Slash/Sweeping Slash damage for killing off adds during this fight.
- For DPS Guardians/Juggernauts, Purifying Sweep/Crushing Fist in the Masterful utility are useful buffs to your Force Sweep/Smash to increase raid DPS on adds.
Sentinel/Marauder
- You definitely want to take increased Cyclone Slash/Sweeping Slash damage for killing off adds during this fight.
- Use your utilities that reduce the cooldowns on your AoE mez (Awe/Intimidating Roar) and increases the effect of Pacify/Obfuscate.
Sage/Sorcerer
- You definitely want to take increased Force Quake/Force Storm damage for killing off adds during this fight.
- You want to take the 25% damage reduction utility from Cloud Mind as an extra cooldown for the burn phase.
- In a pinch, you can use Force Armor/Static Barrier on yourself and others if suddenly targeted by AoE and taken to very low health.
- Pinning Resolve/Oppressing Force, Force Wake/Electric Bindings, Humility/Sap Strength, Kinetic Collapse/Backlash, and Containment/Haunted Dreams are all useful utilities for controlling adds and reducing the damage that they deal to the raid.
Shadow/Assassin
- You definitely want to take increased Whirling Blow/Lacerate damage for killing off adds during this fight.
- Place Phase Walk in a corner ahead of the burn phase in case Deron teleports to that corner. This can be a minor time savings, otherwise just spec into the healing bonus for Phase Walk and place it in the middle of the room.
- To stealth rez in this fight, you must wait until after an add wave spawns and watch for any possible Suppressive Fire attacks that could pull you back into combat.
- Pinning Resolve/Oppressing Force, Force Wake/Electric Bindings, and Containment/Haunted Dreams are all useful utilities for controlling adds and reducing the damage that they deal to the raid.
Gunslinger/Sniper
- You definitely want to take increased Sweeping Gunfire/Suppressive Fire damage for killing off adds during this fight.
- Use your Scrambling Field/Ballistics Shield at the start of the burn phase to mitigate raid wide damage taken while killing off the first boss.
- Plan B & C/Evacuate are useful utilities for controlling adds.
Scoundrel/Operative
- You definitely want to take increased Blaster Volley/Carbine Burst damage for killing off adds during this fight, even though it is an expensive AoE to use.
- To stealth rez in this fight, you must wait until after an add wave spawns and watch for any possible Suppressive Fire attacks that could pull you back into combat.
- Dirty Escape/Slip Away and Anatomy Lessons/Precision Instruments are both useful utilities for controlling adds.
Vanguard/Powertech
- You definitely want to take increased Explosive Surge/Flame Sweep damage for killing off adds during this fight.
- Use Hold the Line/Hydraulic Overrides to resist the knockback from Deron’s Guided Missile Volley attack.
- Efficient Tools/Efficient Suit, Containment Tactics/Prototype Electro Suit, Frontline Defense/Hitman, Accelerated Reel, and Defensive Measures/No Escape are all useful utilities for controlling adds.
Commando/Mercenary
- You definitely want to take increased Hail of Bolts/Sweeping Blasters damage for killing off adds during this fight, even though it is an expensive AoE to use.
- Use Hold the Line/Hydraulic Overrides to resist the knockback from Deron’s Guided Missile Volley attack.
Group parse of first kill

Advanced Strategy/Video Discussion
Tanking Overview:
In this video, one of our main tanks (Smugglin) outlines the Revanite Commanders HM fight from a tanking perspective.
Full Video PoVs
Tank PoV (Shieldtech Powertech):
DPS PoV (Marksmanship Sniper):
Healer PoV (Bodyguard Mercenary):
16m Healer PoV (Corruption Sorcerer):

